To get the most out of your bike dash cam, you need to mount it securely on handlebars or stems using weather-resistant mounts that absorb vibrations. Power options include batteries or wiring into your bike’s electrical system, ensuring stable, weatherproof connections. Always be aware of privacy laws—know where and what you can record—and manage your footage carefully by adjusting privacy settings and storage. Keep safety in mind, and you’ll find these tips will help you ride with confidence and clarity.
Key Takeaways
- Proper mounting ensures stability, reduces vibrations, and prevents obstructing safety gear or views.
- Use weatherproof mounts and secure wiring to protect against humidity, dust, and rough terrain.
- Select reliable power sources like dedicated power banks or bike electrical systems for continuous operation.
- Understand local privacy laws and avoid recording private property or individuals without consent.
- Position cameras to maximize visibility, avoid glare, and manage privacy settings for safe data sharing.
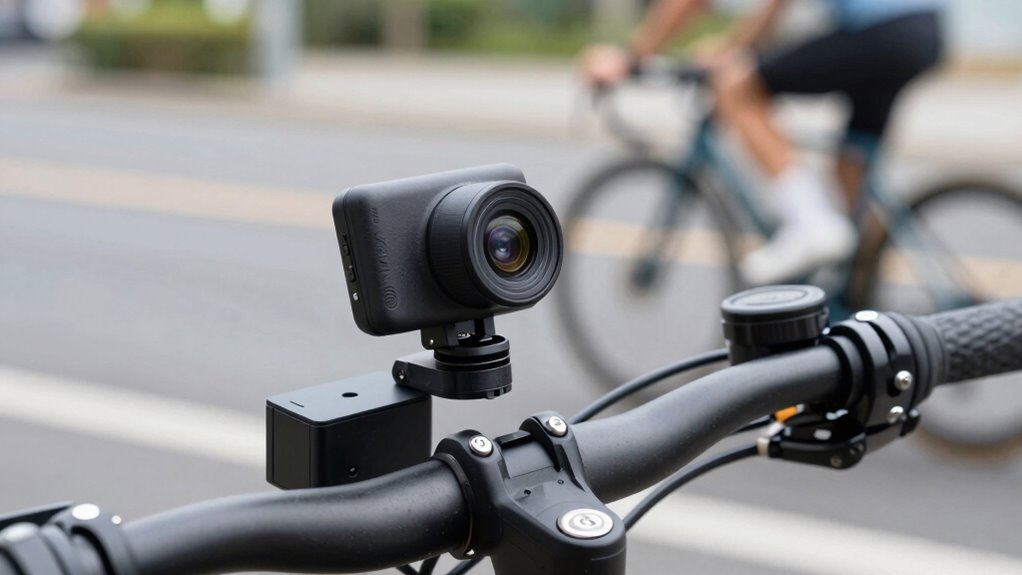
What You Need to Know Before Mounting Your Bike Dash Cam

Before mounting your bike dash cam, it’s important to understand the key factors that can affect its performance and legal use. Proper mounting techniques ensure your camera stays secure and captures clear footage, so choose a stable position that minimizes vibrations. Avoid obstructing your view or covering important signals, like brake lights or turn indicators. Privacy concerns are also crucial; be mindful of local laws regarding recording others, and avoid pointing the camera at private property or individuals without permission. Consider the angle carefully to balance visibility and privacy. Using the right mounting accessories can prevent the camera from shifting or falling, ensuring reliable recording. Being aware of these factors helps you stay compliant and make the most of your bike dash cam’s features. Incorporating European cloud innovation into your data management can also enhance security and sustainability for your device’s footage storage. Additionally, understanding privacy laws related to recording can help you avoid potential legal issues. Proper knowledge of camera placement techniques can improve your footage quality and overall experience, especially when considering storage options to ensure your recordings are safely preserved. For optimal results, research vibration damping methods to minimize motion blur and maintain clarity in your footage.
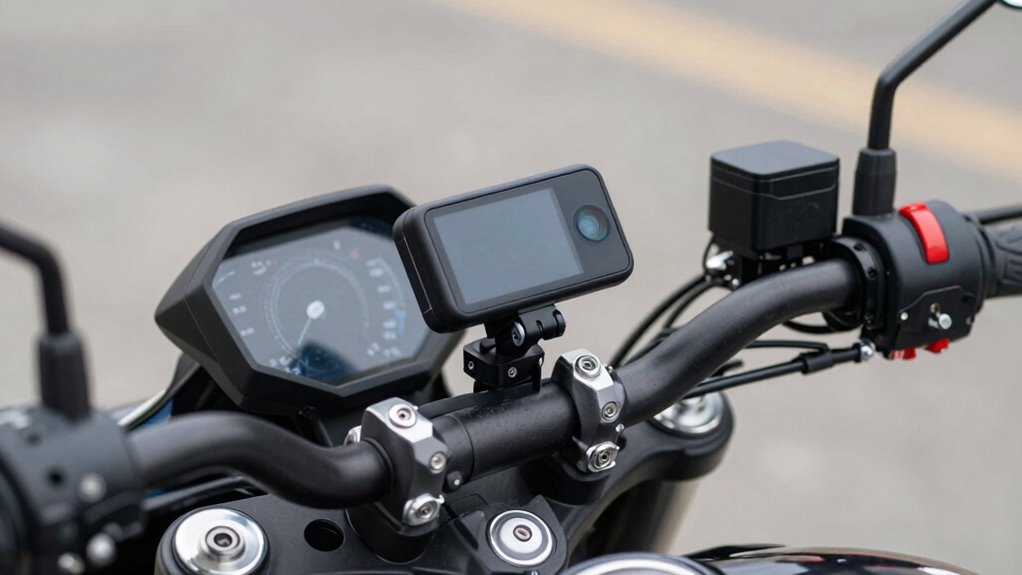
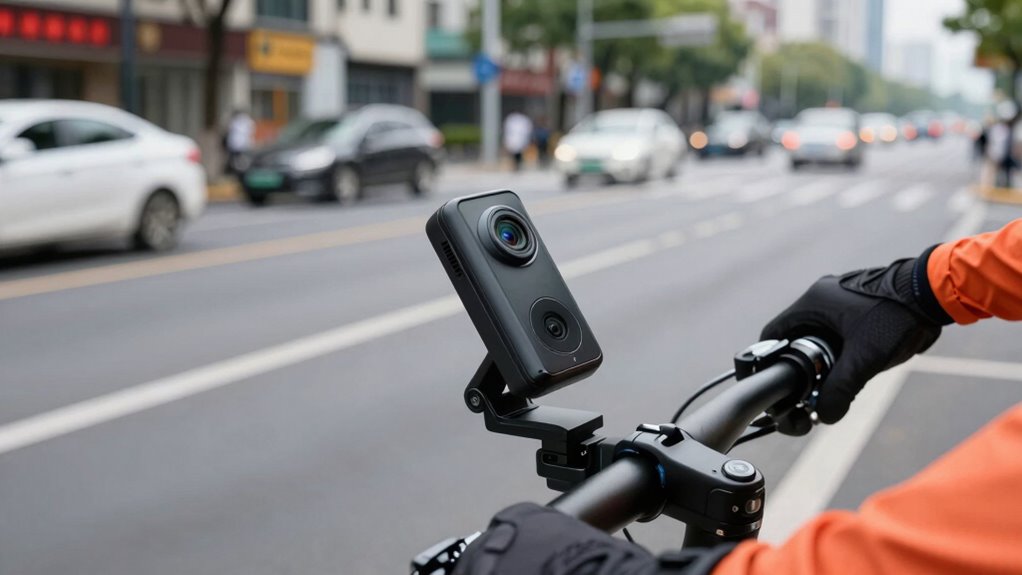
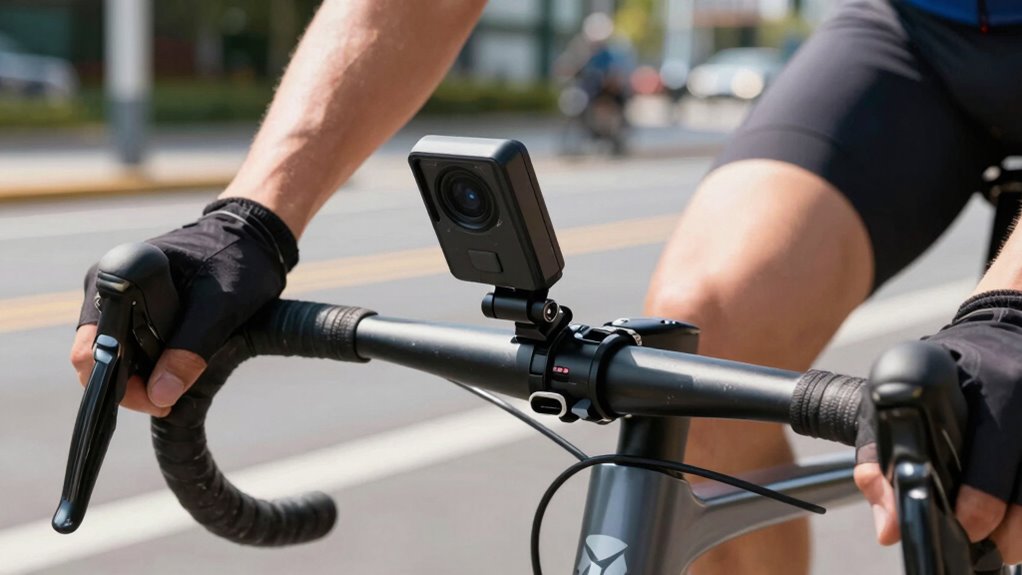
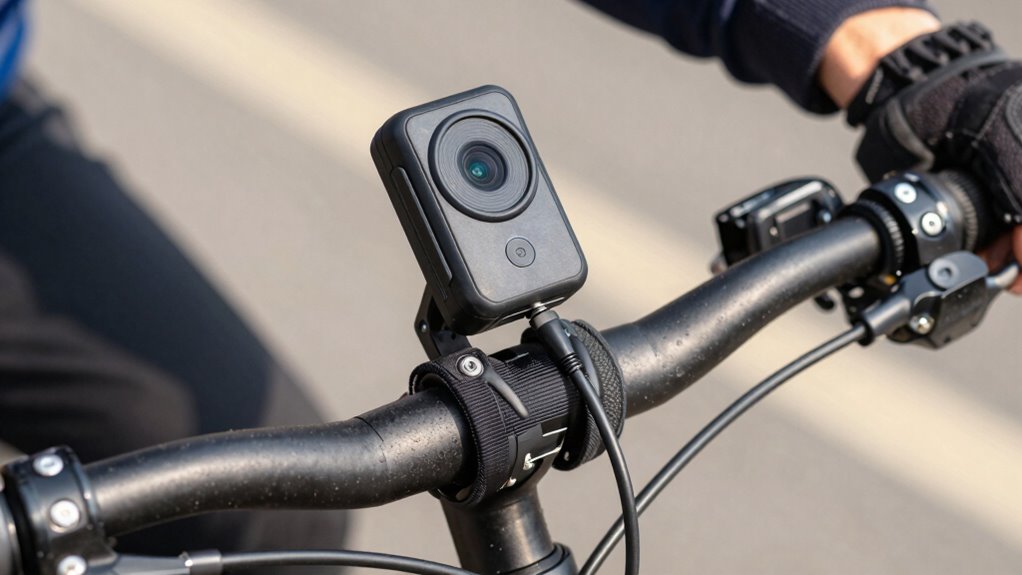
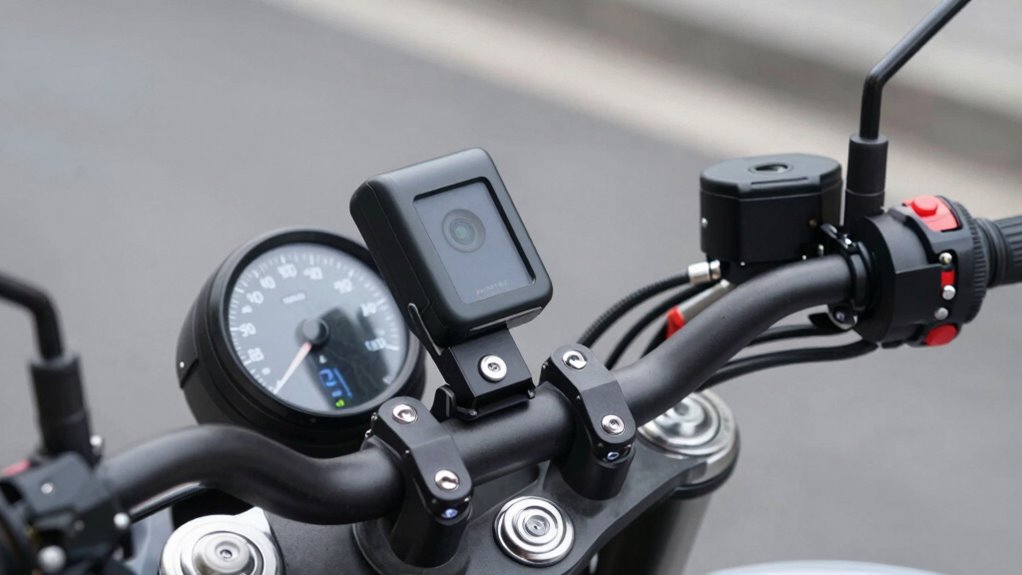
How to Securely Mount Your Bike Dash Cam for Safety and Convenience

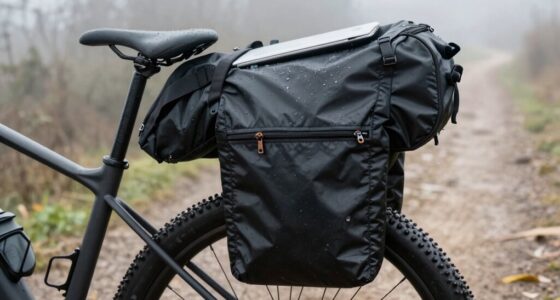
To guarantee your bike dash cam remains effective and reliable, securing it properly is a must. Choose a mounting method that keeps the camera stable and minimizes vibrations, ensuring clear footage. Position the dash cam where it won’t obstruct your helmet safety or block your view, preferably on the handlebars or stem. Use weather-resistant mounts designed for outdoor use to withstand rain, dust, and debris, maintaining functionality in all conditions. Make sure the mount is tight but not overtightened, preventing movement during rides. Regularly check the attachment to confirm it stays secure, especially after rough rides or weather changes. Additionally, consider the environmental factors that could impact your dash cam’s performance and choose a setup that accounts for exposure to various elements. Proper mounting not only enhances safety but also helps preserve the durability and effectiveness of your device over time. Selecting a mount with vibration absorption features can further improve footage stability and longevity of your dash cam. Incorporating shock-resistant mounts can provide extra protection against impacts and rough terrain, ensuring consistent recording.
How to Power Your Bike Dash Cam: Batteries, Wiring, and Setup Tips
Choosing the right power source is key to keeping your bike dash cam running smoothly. You’ll want to check compatibility and make certain safe wiring during installation. Proper setup not only extends your camera’s life but also keeps your ride safe. Additionally, understanding the power management aspects can help optimize battery life and prevent electrical issues. For optimal performance, consider integrating your dash cam with smart‑home integrations that can monitor and control power sources automatically. To further enhance reliability, regularly inspecting your electrical connections can prevent potential failures during rides. Being aware of the filtration systems in your power sources can also contribute to a cleaner and safer electrical setup.
Power Sources and Compatibility
Powering your bike dash cam correctly is essential for reliable recording and safety. You have several battery options to consider, such as rechargeable power banks or built-in rechargeable batteries, which offer portability and easy setup. When choosing a power source, verify compatibility with your dash cam’s power requirements to avoid malfunctions. Verify the voltage and current ratings to prevent damage or insufficient power supply. Many dash cams are designed to connect directly to your bike’s electrical system via wiring, providing continuous power while riding. Always double-check the compatibility of your chosen power source with your specific model. Properly matching battery options and ensuring power compatibility will help you avoid interruptions, extend device lifespan, and maintain consistent recording during your rides. Additionally, selecting a durable and moisture-wicking fabric that offers durability and moisture-wicking properties can enhance the overall performance and longevity of your gear, especially in demanding conditions. Understanding power management features in your dash cam can also help optimize battery life and ensure reliable operation over long rides. To maximize efficiency, consider utilizing smart charging features if available to prevent overcharging and prolong battery health.
Installation and Safety Tips
Ensuring your bike dash cam is installed safely and correctly is essential for reliable recording and rider safety. Start by choosing a secure mounting spot that doesn’t interfere with your helmet safety or visibility. Use weatherproofing tips, like sealing connections and choosing weather-resistant mounts, to protect your device from rain, dust, and dirt. Avoid wiring that could snag or cause accidents; opt for clean, tucked-away cables. Double-check that your camera is firmly attached to prevent vibrations or falls. Regularly inspect your setup for damage or loose parts. Remember, a well-installed dash cam doesn’t just record your rides—it keeps your helmet safety a priority and remains functional in all weather conditions. Proper installation guarantees peace of mind on every trip. Additionally, consider the air quality of your environment and ensure your wiring and components are protected from humidity and dust for optimal performance.
Privacy Laws and Recording Rules Every Cyclist Should Know
As a cyclist with a dash cam, you need to understand your legal limits for recording. Knowing the rules about privacy boundaries helps you avoid infringing on others’ rights. Staying informed guarantees you record responsibly and avoid potential legal issues. Additionally, familiarizing yourself with local regulations regarding public recording areas ensures you remain compliant with privacy laws. Being aware of air quality considerations can also influence how and when you record, especially in urban environments with pollution concerns. Monitoring noise levels can be crucial, as excessive sound recordings may breach local ordinances. Understanding media literacy helps you interpret recorded footage accurately and avoid misrepresentations. Recognizing the importance of regulatory compliance ensures that your recording practices adhere to applicable laws and guidelines.
Legal Recording Limits
Understanding the legal limits of recording while cycling is essential to avoid infringing on others’ privacy rights. Privacy legislation varies by region, but most places impose recording restrictions to protect individuals’ privacy. As a cyclist with a dash cam, you need to know where and when recording is permitted. Violating these rules can lead to legal consequences or invalidated footage. Be aware that recording in private areas without consent is often prohibited, and audio recordings may have stricter rules than video.
- Recording restrictions may require you to focus only on public spaces.
- Some jurisdictions demand clear signage indicating recording is happening.
- Laws often specify whether you can record audio, video, or both, and under what circumstances.
Respecting Privacy Boundaries
Respecting privacy boundaries is essential when using a bike dash cam, as laws are designed to protect individuals’ rights. You should be aware of privacy concerns, especially when recording in public spaces where others might expect a certain level of privacy. Avoid capturing sensitive or private activities that could invade someone’s privacy. Be cautious about data sharing; only share footage with trusted parties and understand how your recordings might be used or stored. Some regions have strict rules against recording individuals without their consent, so always stay informed about local regulations. It’s also helpful to familiarize yourself with vintage technology to better understand how modern devices can be integrated thoughtfully without infringing on privacy. Additionally, understanding public space regulations can help ensure your recording practices align with community standards. By respecting privacy boundaries, you help prevent legal issues and foster trust within your community. Remember, responsible recording benefits everyone and keeps your cycling experience positive.
Tips for Positioning Your Bike Dash Cam for Clear Footage
Positioning your bike dash cam correctly is essential for capturing clear, useful footage. The right camera angle ensures important details like license plates are visible, while considering lighting conditions helps prevent glare or shadows that can obscure images. To optimize your shot, place the camera at a height and angle that covers the road ahead without too much distortion. Avoid placing it too low or too high, which can compromise image clarity.
- Adjust the camera angle to maximize forward visibility and minimize blind spots
- Position the camera to face into natural lighting, avoiding direct sunlight that causes glare
- Guarantee the camera is stable and free from vibrations that could blur footage
Troubleshooting Mounting Stability and Power Supply Problems
Ensuring your bike dash cam stays securely mounted and powered throughout your ride can be challenging, especially on bumpy roads or during long trips. Mounting vibration can loosen the camera or cause shaky footage, so guarantee your mount is tight and stable. Use vibration-dampening accessories, like foam pads or rubber grommets, to absorb shocks. Power fluctuation is another common issue; check your connections and guarantee the power source is stable. If your camera turns off unexpectedly, consider using a higher-quality power cable or a dedicated power bank. Regularly inspect your mounting setup and power connections before rides. Addressing these issues helps prevent footage loss and keeps your dash cam functioning reliably, even on rough terrain.
Managing Privacy Settings and Data Storage on Your Bike Dash Cam

Managing privacy settings and data storage on your bike dash cam is essential to safeguard your personal information and ensure you retain control over your footage. Properly configuring privacy settings helps prevent unauthorized access, while managing data storage ensures you don’t run out of space or lose important clips. Review your device’s privacy options, such as disabling GPS tracking or anonymizing footage when necessary. Regularly back up important data to an external drive or cloud service to prevent loss. Additionally, keep an eye on data storage capacity by deleting outdated or irrelevant recordings.
Safeguard your footage by managing privacy settings and backing up data regularly.
- Adjust privacy settings to control who can view or share footage
- Choose the right data storage method, like SD cards or cloud options
- Set automatic overwriting preferences to manage storage efficiently
Common Installation Mistakes to Avoid With Your Bike Dash Cam
Installing your bike dash cam correctly is crucial to guarantee it functions reliably and captures clear footage. One common mistake is improper mounting techniques, which can result in shaky or obstructed video. Make sure the camera is securely attached to avoid vibrations or falls, and position it for an unobstructed view of the road. Avoid mounting it too high or low, as this can affect footage quality or distract you while riding. Additionally, be mindful of privacy concerns; mounting the camera where it doesn’t intrude on others’ privacy helps prevent legal issues. Double-check that cables are neatly secured to prevent interference or damage. Proper installation not only improves footage clarity but also respects the privacy of others, keeping your ride safe and compliant.
How to Respect Others’ Privacy While Recording Rides
Properly mounting your bike dash cam not only improves footage quality but also shows respect for others’ privacy. To honor public privacy, avoid recording or sharing footage that captures identifiable individuals without their consent. Be mindful of data sharing; only upload recordings to trusted platforms and consider blurring faces or license plates when possible.
To further respect privacy, consider these practices:
- Limit recordings to necessary moments, avoiding continuous recording in crowded areas.
- Inform passengers or cyclists when recording, especially if footage might be shared.
- Regularly review footage to delete any recordings that infringe on private moments or sensitive information.
Choosing the Best Bike Dash Cam: Features, Mounting, Power, and Privacy

Choosing the right bike dash cam involves considering key features, mounting options, power sources, and privacy features to guarantee it meets your riding needs. Focus on mounting techniques that keep the camera secure and unobtrusive, whether handlebar mounts or helmet attachments. Ascertain the camera has reliable power, such as a direct connection to a battery or a portable power bank, so recordings aren’t interrupted. Privacy considerations are essential; look for models with adjustable privacy settings to control who can view footage. Select features like wide-angle lenses, night vision, and easy-to-use controls. By evaluating these aspects, you’ll find a bike dash cam that offers clear recordings, stays securely mounted, and respects both your privacy and that of others.
Frequently Asked Questions
Can I Use a Car Dash Cam as a Bike Dash Cam?
You can technically use a car dash cam as a bike camera, but it’s not ideal. Most dash cams lack bike camera compatibility, and a dash cam conversion isn’t straightforward due to size, mounting, and power differences. Car dash cams are designed for cars’ power sources and mounting options, so they may not securely fit or operate well on a bike. For best results, choose a camera specifically made for biking.
Are There Waterproof Options Available for Bike Dash Cams?
Yes, waterproof options for bike dash cams are like a shield against the storm. These cameras offer excellent weather resistance and waterproof durability, ensuring they keep recording no matter rain, mud, or splashes. Designed specifically for bikes, they withstand harsh conditions, so you don’t have to worry about weather ruining your footage. Look for models with high IP ratings to guarantee your camera stays protected in all outdoor adventures.
How Long Can a Bike Dash Cam Record Continuously?
You can typically record continuously for about 1 to 4 hours, depending on your bike dash cam’s battery life and storage capacity. If it’s powered via a direct connection, it can record for as long as you ride, but if it relies on a battery, expect shorter sessions. To maximize recording time, choose a model with larger storage capacity and efficient power consumption, ensuring you capture all your rides without interruption.
Do Bike Dash Cams Have GPS Tracking Features?
Imagine you’re cycling through busy streets, and your bike dash cam with GPS features records your route and speed. Many bike dash cams include GPS tracking, providing location data for route mapping and safety. However, you should be cognizant of data privacy concerns, as GPS data can reveal your movements. Always check the device’s privacy settings to control who can access your GPS data and ensure your privacy stays protected.
Can I Connect My Bike Dash Cam to My Smartphone?
Yes, you can connect your bike dash cam to your smartphone through wireless connectivity. Most models offer app integration, allowing you to easily sync footage, adjust settings, and monitor your ride in real-time. Simply download the compatible app, enable Bluetooth or Wi-Fi, and follow the pairing instructions. This setup makes managing your dash cam convenient, giving you quick access to recordings and ensuring your device stays connected during your ride.
Conclusion
By mastering mounting, powering, and respecting privacy, you’ll transform your bike dash cam into an unstoppable guardian of your rides. Avoid common mistakes and stay informed about laws, and you’ll capture crystal-clear footage like a camera-wielding superhero. With the right setup, your camera becomes a vigilant sentinel, safeguarding your adventures and ensuring you ride confidently through busy streets and quiet trails alike. Get it right, and your bike dash cam will be your most trusted cycling companion!