To perform a salt test at home, you’ll create a stable salt solution with about a teaspoon of salt per cup of distilled water. Place your sensor in a sealed container with the solution and wait for 8 to 12 hours. If your sensor is accurate, its reading should stabilize near 75% humidity. If you want detailed steps and troubleshooting tips, keep exploring to guarantee your sensor stays reliable.
Key Takeaways
- Prepare a salt solution with about one teaspoon of salt per cup of distilled water for a stable humidity environment.
- Place the sensor in a sealed chamber with the salt solution and wait 8–12 hours for readings to stabilize.
- Compare the sensor’s readings to the expected 75% humidity level typical of salt test environments.
- Ensure consistent testing conditions, avoiding heat, sunlight, or airflow that could affect results.
- Recalibrate or clean the sensor if readings significantly deviate from expected levels to maintain accuracy.
What Is the Humidity Sensor Salt Test and How Does It Work?
The humidity sensor salt test is a method used to evaluate the accuracy and reliability of humidity sensors by exposing them to controlled salt environments. This process helps with sensor calibration, ensuring readings stay precise over time. During the test, you place the sensor in a sealed chamber with a specific salt solution that maintains stable humidity levels. These salt solutions create a consistent environment, allowing you to see if the sensor accurately detects the humidity. If the sensor’s readings deviate from expected levels, it may need recalibration or replacement. This test provides a simple, effective way to verify your sensor’s performance without complex equipment, giving you confidence in its ability to measure humidity accurately in real-world conditions. Proper testing protocols help maintain sensor longevity and performance, ensuring it continues to operate effectively. Additionally, understanding the importance of calibration ensures your sensor continues to deliver precise readings over time. Regular testing can also help identify early signs of sensor degradation, preventing inaccurate measurements in critical applications. Incorporating consistent testing methods ensures ongoing accuracy and reliability of your humidity measurements.
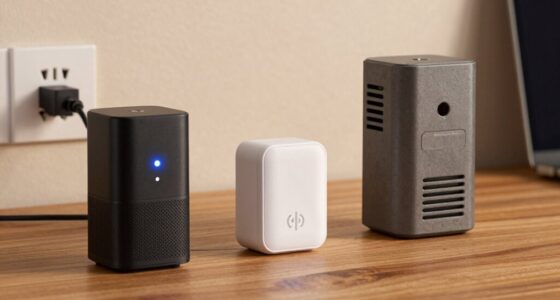
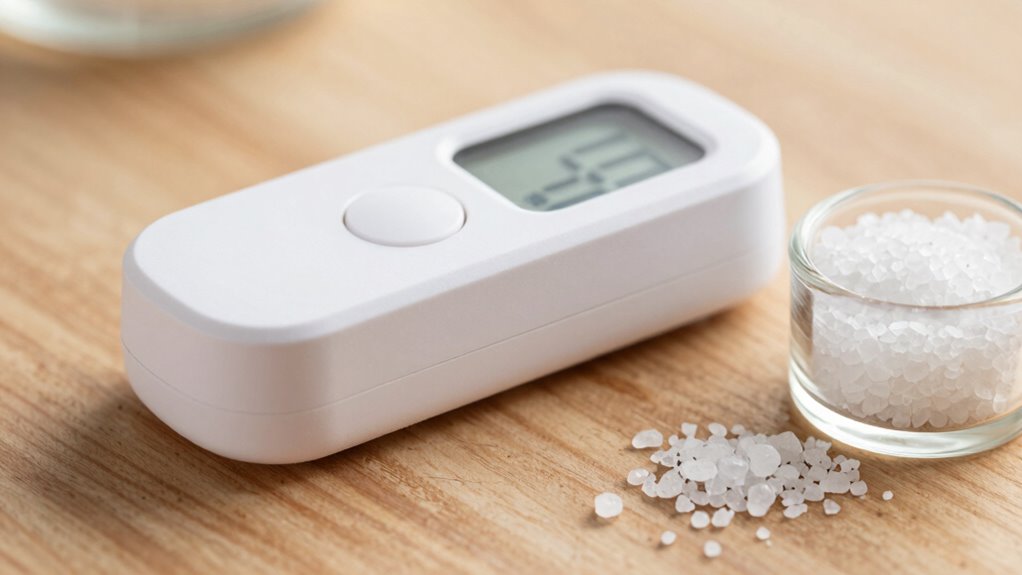
What You Need to Perform the Salt Test
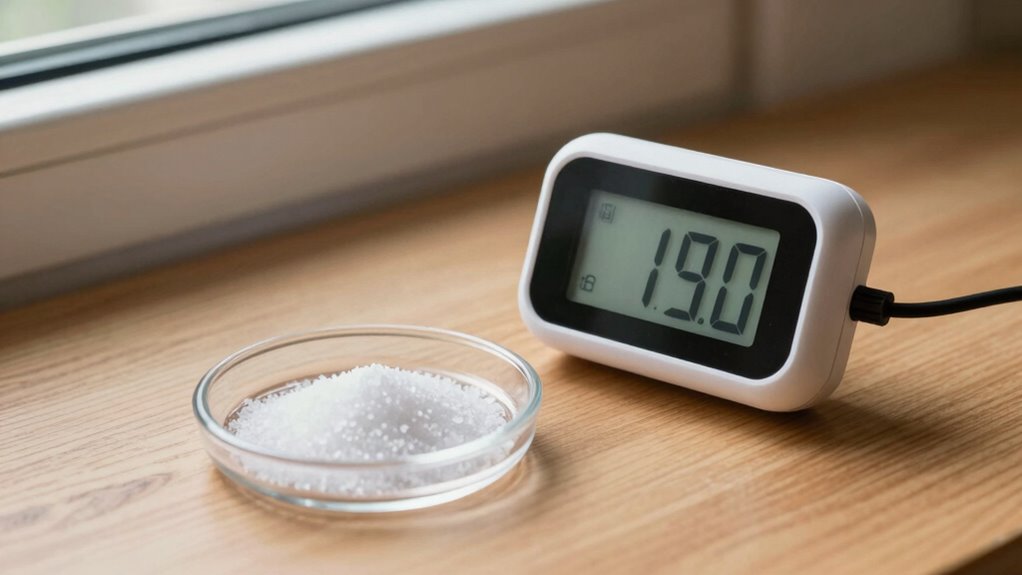
To perform the salt test accurately, you’ll need a few key items. First, gather a small container or dish to hold the salt solution. You’ll also need table salt and distilled water to create a consistent saline environment. A plastic or glass lid can help contain the mixture. Keep your humidity sensor nearby for testing, ensuring it’s properly maintained for accurate results. Understanding calibration techniques is essential, so have your device’s manual handy to interpret readings afterward. Additionally, verify your sensor is clean and free from dust or debris—proper sensor maintenance improves reliability. Regularly checking your sensor calibration ensures ongoing accuracy. Finally, a thermometer can help verify the temperature, as humidity levels vary with temperature. With these items, you’re set to perform an effective salt test at home.
How to Perform the Salt Test on Your Humidity Sensor

To perform the salt test on your humidity sensor, start by preparing a salt solution correctly to guarantee accurate results. Next, position your sensor properly in the setup, then observe and record its readings carefully. Ensuring the test conditions are stable will help you assess your sensor’s performance effectively. Additionally, using precise measurement techniques can improve the reliability of your results. Maintaining a consistent environment during the test can help in obtaining more reliable data for accurate assessment. Following these steps will help you assess your sensor’s performance effectively. Be sure to understand the humidity sensor salt test procedure thoroughly to ensure reliable and consistent results.
Prepare Salt Solution Properly
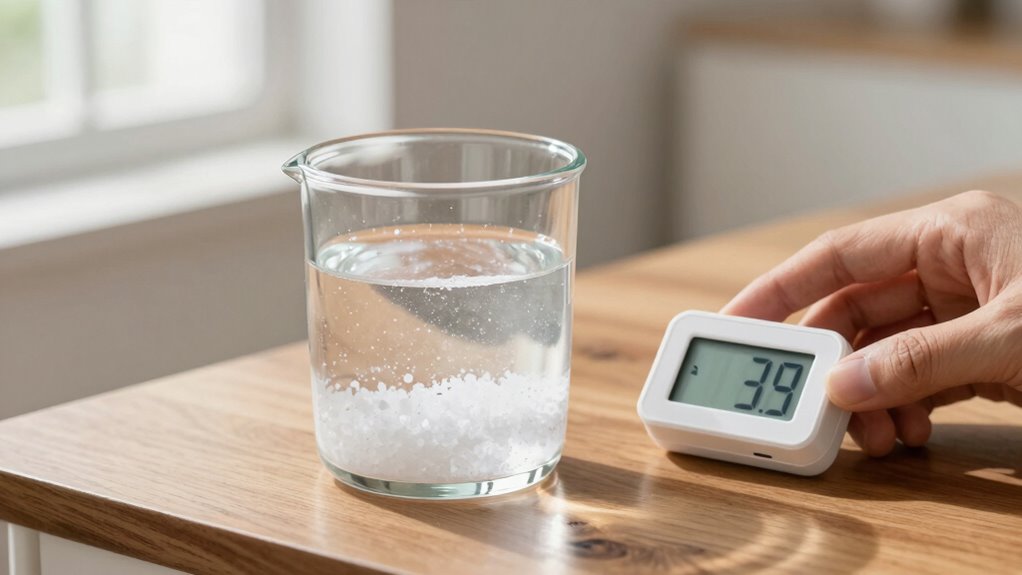
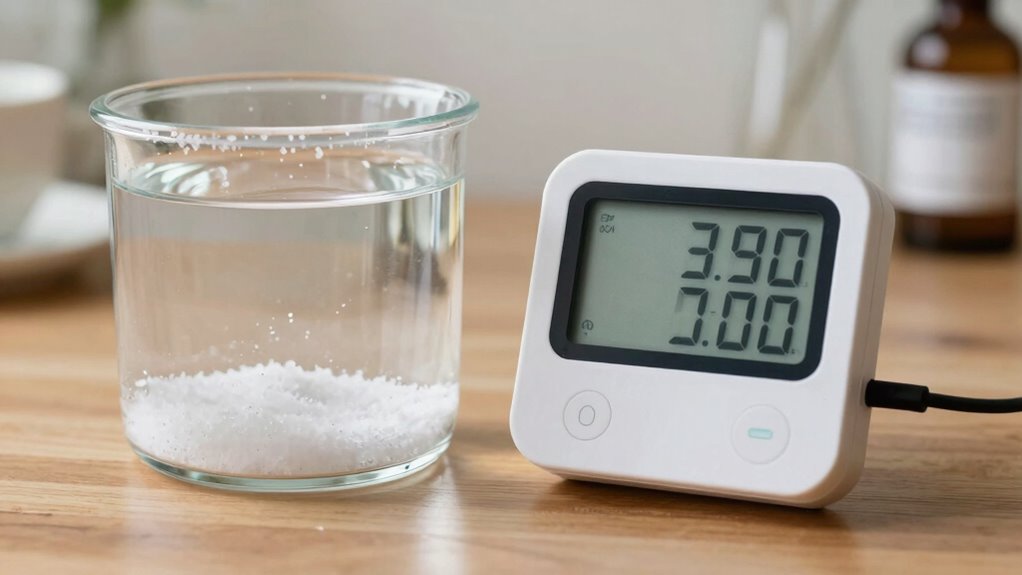
Preparing a salt solution correctly is essential for an accurate humidity sensor salt test. To guarantee proper salt concentration, dissolve the right amount of salt—usually about a teaspoon of salt per cup of distilled water—while stirring until fully dissolved. Using distilled water helps maintain solution purity and consistency. It’s important to achieve solution stability, meaning the salt concentration remains constant over time, so avoid solutions that evaporate quickly or form crystals on the surface. Prepare the solution fresh before testing, as evaporation or contamination can alter its properties. Accurate salt concentration ensures your sensor is exposed to a stable humidity environment, making your test results reliable. Proper preparation minimizes errors and gives you confidence in evaluating your sensor’s accuracy. Understanding humidity control can help you interpret your results more effectively. Additionally, using a standardized salt solution ensures consistency across tests and improves the reliability of your readings.
Place Sensor Correctly
Ensuring your humidity sensor is placed correctly is essential for an accurate salt test. Proper sensor placement means positioning it in a stable environment, away from direct sunlight, drafts, or sources of heat. Environmental factors like temperature fluctuations or humidity levels outside the test area can influence your results. Place the sensor on a flat, stable surface within the container, ensuring it doesn’t touch the salt solution or sides. Keep it at a consistent height, avoiding any contact with the salt or water. This helps prevent false readings caused by uneven exposure or external influences. By paying attention to sensor placement, you minimize environmental interference, ensuring your salt test accurately reflects your sensor’s true performance. Proper placement is key to reliable, repeatable results. Understanding sensor calibration can further enhance your testing accuracy. Additionally, monitoring sensor placement regularly ensures consistent results over time. A well-placed sensor reduces the risk of external interference, ultimately leading to more trustworthy readings. For optimal accuracy, also consider the environmental conditions around your sensor, which can impact its readings.
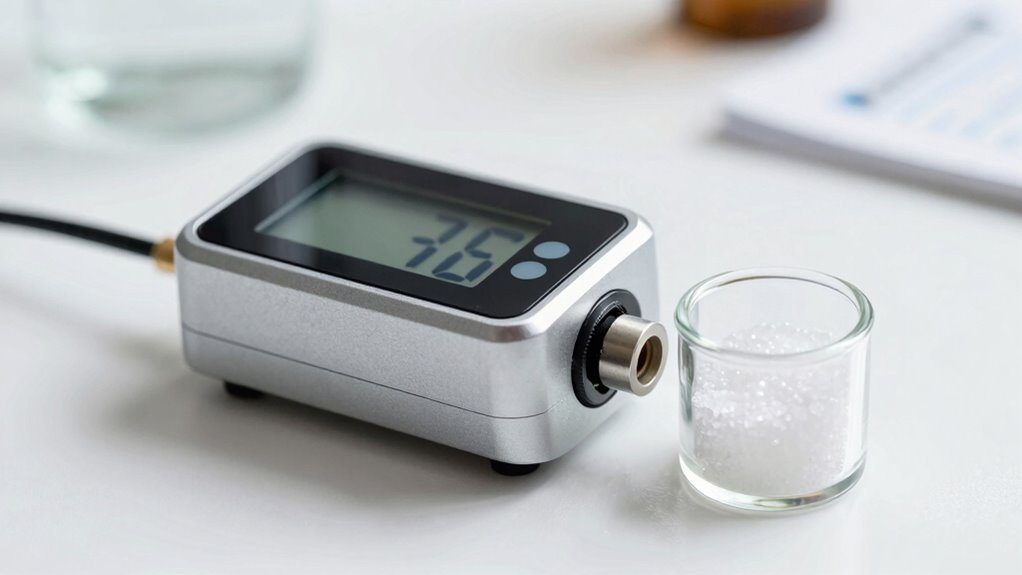
Observe and Record Results
Once your humidity sensor has been properly placed, it’s time to observe and record the results of the salt test carefully. Watch the sensor’s reading closely and note whether it stabilizes near the expected 75% humidity level, indicating proper sensor calibration. Keep in mind that environmental factors, like temperature and airflow, can influence the readings, so try to minimize drafts or temperature fluctuations. Record the initial reading, then check again after the recommended waiting period, usually 8–12 hours. Compare the final reading to the target humidity; a significant deviation suggests the sensor needs recalibration or replacement. Accurate recording ensures you can assess whether your sensor functions correctly or if further adjustments are necessary to maintain reliable humidity measurements. Understanding sensor calibration is essential for ensuring accurate humidity control in your kitchen environment. Additionally, understanding the electric power output of devices like bike generators can help you optimize energy efficiency during testing or other applications. Proper testing conditions and environmental awareness are crucial for obtaining reliable results from your humidity sensor, especially when considering smart home integration for automated climate control. Being aware of environmental influences can further improve the accuracy of your humidity readings.
Interpreting Your Salt Test Results: Is Your Sensor Accurate?
To determine if your salt test results are accurate, you need to carefully compare your sensor’s readings with expected values and look for consistency. Sensor calibration plays a vital role; if your readings are substantially off from the known salt test humidity level (around 75%), it’s a sign your sensor may need recalibration. Keep in mind that humidity fluctuations can cause temporary variations in your readings, so consider the overall trend rather than a single measurement. Regularly monitoring and comparing your results helps guarantee your humidity sensor remains reliable over time. Proper calibration is essential for ensuring accurate measurements and maintaining sensor reliability. Additionally, understanding how sensor behavior responds to environmental changes can help you interpret your salt test more effectively. Recognizing sensor response patterns can help you identify when your sensor needs recalibration or maintenance. Being aware of sensor drift over time can also alert you to potential accuracy issues before they become critical, and understanding measurement stability can further improve your confidence in the sensor’s performance.
Troubleshooting Salt Test Failures and Common Sensor Issues
When salt test results don’t match expected humidity levels, it often signals sensor issues or setup problems. One common cause is that your humidity sensor may need recalibration, especially if it’s been in use for a while. Proper sensor calibration ensures your device provides accurate readings, so regularly check and adjust as needed. Faulty sensor connections or dirt buildup can also cause inaccurate results, highlighting the importance of routine device maintenance. If your salt test consistently fails, consider cleaning the sensor gently and verifying that it’s properly positioned within the test environment. Sometimes, replacing the sensor or recalibrating it can resolve persistent issues. Staying on top of device maintenance helps prevent false readings and keeps your humidity sensor functioning reliably.
Tips to Keep Your Humidity Sensor Accurate and When to Re-Test
Maintaining your humidity sensor’s accuracy requires regular attention and proper handling. To ensure consistent humidity accuracy, calibrate your sensor periodically using salt tests or manufacturer guidelines. Avoid exposing the sensor to rapid temperature changes or direct moisture, which can skew readings. Keep the sensor clean and store it in a stable environment when not in use. Re-test your sensor if you notice inconsistent readings or after any rough handling. Regular calibration helps catch drift in sensor performance, maintaining reliable measurements. If your sensor shows signs of inaccurate readings despite calibration, consider replacing it or seeking professional calibration services. Staying vigilant with these tips ensures your humidity sensor remains precise and dependable over time.
Frequently Asked Questions
How Often Should I Perform the Salt Test for My Humidity Sensor?
You should perform the salt test every 6 to 12 months to maintain proper sensor calibration. Regular test frequency guarantees your humidity sensor remains accurate over time, especially if it’s exposed to changing environments. If you notice inconsistent readings or suspect calibration issues, do the salt test more often. Consistent testing helps you catch problems early, keeping your sensor reliable and your indoor climate properly monitored.
Can Temperature Affect the Accuracy of the Salt Test?
Yes, temperature fluctuations can affect the accuracy of your salt test because humidity levels vary with temperature. If the room temperature isn’t stable, your readings might be off, making calibration frequency more important. To get reliable results, perform the test in a consistent environment and recalibrate your sensor regularly, especially if you notice temperature changes. This helps maintain your sensor’s accuracy over time.
Is the Salt Test Suitable for All Types of Humidity Sensors?
This salt test isn’t a miracle for all humidity sensors. It’s mainly suitable for sensors designed for general humidity measurement, but sensor compatibility varies. Some sensors with specialized features or different technologies may not respond accurately to the salt test. Be aware of its limitations, as it can’t guarantee perfect results for every sensor type. Always check manufacturer guidelines before relying solely on this simple, yet limited, accuracy check.
What Are Signs That My Sensor Needs Replacement Instead of Recalibration?
If your humidity sensor shows inconsistent readings or fails calibration indicators despite recalibration, it’s likely time to substitute it. Sensors typically have a limited lifespan, usually around 3-5 years, depending on usage. Look for signs like drifting measurements, slow response times, or complete failure to detect humidity changes. When these issues occur, replacing your sensor ensures accurate readings and reliable performance.
Are There Alternative Methods to Verify Humidity Sensor Accuracy at Home?
Think of verifying your humidity sensor like a vintage radio—you can’t just tune it by ear. You can try DIY calibration using household items like salt or creating a controlled environment to test readings. Electronic testing with a multimeter or a known humidity source provides more precise results. These methods help confirm if your sensor is accurate or if it’s time to replace it, saving you from guesswork.
Conclusion
Performing the salt test is your simple yet powerful way to guarantee your humidity sensor stays spot-on. With just a few household items, you can catch inaccuracies before they turn into major issues. Think of it as your sensor’s ultimate health check—like a heartbeat monitor for your device. Regularly re-testing keeps your home’s environment perfectly calibrated, making your sensor’s accuracy as reliable as the sunrise. Don’t wait—keep your humidity readings flawless and your home comfortable!