
To get a natural, professional look with your teleprompter, choose a size that matches your setup and viewer distance—larger for distant shots, smaller for tight spaces. Use an 85mm lens for flattering facial perspective and minimal distortion, and keep your gaze aligned with the camera to maintain eye contact. Practice steady eye movements and relaxed expressions. If you keep these tips in mind, you’ll be well on your way to polished presentations—all the details you need await further tips.
Key Takeaways
- Match teleprompter size to your setup and viewer distance for comfortable reading and clear eye contact.
- Use an 85mm lens to achieve natural facial proportions and minimize distortion during recording.
- Maintain consistent eye‑line directly with the camera lens to foster genuine audience connection.
- Test font size and script flow to ensure readability, avoiding lenses that distort or make reading uncomfortable.
- Adjust teleprompter position and brightness based on lighting conditions to reduce glare and improve visibility.
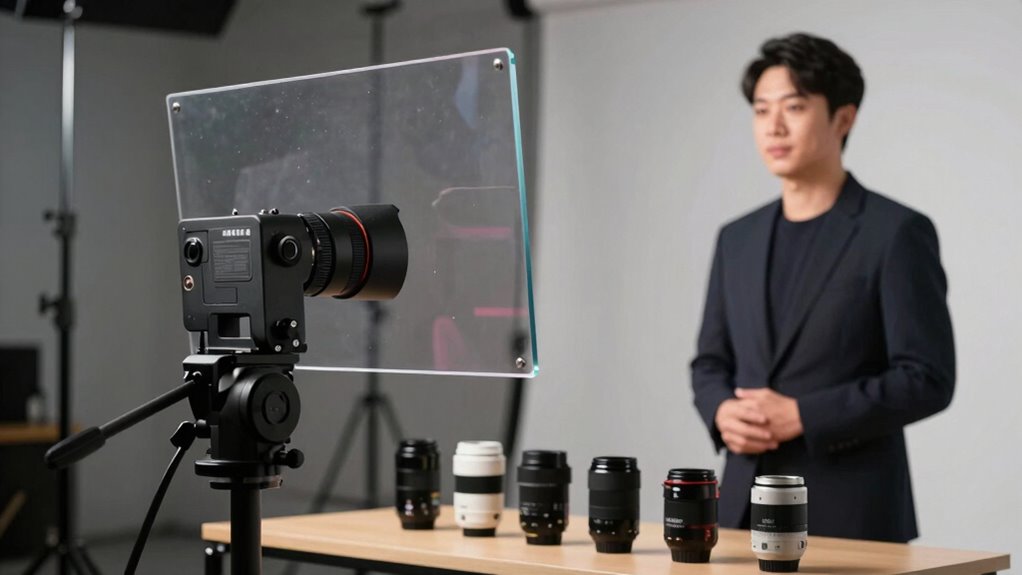
How to Choose the Right Teleprompter Size for Your Setup

Choosing the right teleprompter size is essential for ensuring smooth delivery and clear visibility. You need to take into account the screen size that matches your setup and the viewer distance. A larger screen size is ideal if you’re recording from a distance, as it makes the text easier to read without straining your eyes. Conversely, if you’re working in a small space or close to the camera, a smaller teleprompter may be more suitable, preventing distraction and maintaining natural eye contact. The goal is to select a size that allows you to read comfortably without shifting your focus or losing eye contact with the camera. Additionally, considering the appropriate contrast ratio of your teleprompter display can further improve readability in various lighting conditions. Selecting the right teleprompter placement can also help optimize your line of sight and reduce neck strain during longer recordings. Proper screen brightness settings can enhance visibility and reduce eye fatigue over extended periods. By matching your teleprompter’s screen size to your viewer distance, you’ll ensure a seamless, professional presentation every time. Incorporating ergonomic viewing angles can also help reduce fatigue during longer recordings.
Picking the Best Camera Lens for Clear, Natural Eye Contact
The right camera lens can make a significant difference in how natural and engaging your eye contact appears on camera. To achieve this, choose a lens that flatters your face and minimizes distortion, especially when considering lighting conditions. A portrait lens around 85mm offers a natural look without exaggerating facial features. Remember, good audio quality and proper lighting enhance your overall presence, making your eye contact more authentic. Additionally, selecting a camera lens that aligns with your shooting environment can help improve overall image quality and viewer engagement. Using the right lens also helps maintain natural perspective, ensuring your audience feels more connected during your presentation. Paying attention to lens selection can dramatically impact the authenticity of your connection with viewers. Proper lens choices can also reduce distortion, creating a more flattering and realistic appearance on camera. Incorporating adaptive lighting techniques can further enhance your on-camera presence by reducing shadows and highlighting your eyes effectively.
Eye‑Line Tips: How to Keep Your Gaze Looking Natural

To keep your gaze looking natural on camera, focus on maintaining a steady and consistent eye‑line that aligns with your audience. This helps you appear engaged and confident. Practice relaxing your facial expressions so your face feels natural and expressive, avoiding any stiffness that might distract viewers. Use slight, natural movements in your eyes to convey emphasis or emotion, which complements your voice modulation. Smooth progressions in facial expressions and voice tone make your delivery more authentic and relatable. Keep your gaze focused on the camera lens, as if you’re speaking directly to someone, to foster a genuine connection. Pay attention to camera positioning to ensure your eye‑line remains natural and comfortable. Being aware of visual cues can also help you gauge audience engagement and adjust your delivery accordingly. Incorporating body language subtly can further enhance your on-camera presence and make your delivery more dynamic. Additionally, practicing eye‑line techniques regularly can improve your overall on-camera confidence and authenticity. Developing a consistent eye contact pattern can also help you appear more natural and trustworthy to your viewers. By syncing your facial expressions with your voice, you maintain a natural and compelling presence on screen.
Common Mistakes When Sizing or Selecting a Lens for Your Teleprompter
One common mistake is selecting a lens that’s either too wide or too narrow for your teleprompter setup, which can distort your on-camera appearance or make reading awkward. An unsuitable lens can cause issues with script scrolling, making it hard to keep your eye-line natural. Additionally, choosing the wrong lens may force you to squint or lean forward, affecting your comfort and confidence. To avoid these pitfalls, consider these points:
- Picking a lens that matches your camera’s distance from the teleprompter
- Ensuring the lens provides a realistic field of view
- Avoiding lenses that distort your face or make fonts appear too small or large
- Checking if the lens accommodates your font size preferences
- Testing for smooth script scrolling without eye strain
Getting the right lens helps you maintain a professional look and read effortlessly.
Adjusting Your Teleprompter and Eye‑Line for Different Shooting Environments
Adjusting your teleprompter and eye-line is essential when working in different shooting environments to keep your delivery natural and engaging. Varying studio lighting can cause reflections or glare on the glass, so reposition your teleprompter to avoid these issues. Microphone placement also influences eye-line; ensure microphones don’t block your view or cause distractions. Use this table as a quick guide:
| Environment | Teleprompter Adjustment | Eye‑Line Tip |
|---|---|---|
| Bright studio lighting | Move teleprompter closer or darker overlay | Look slightly above the camera lens |
| Low-light setting | Increase teleprompter brightness | Maintain steady eye contact |
| Outdoor shoot | Use anti-glare screen | Keep eye-line consistent with camera angle |
| Noisy environment | Adjust microphone placement for clarity | Focus on natural expression |
| Small space | Minimize reflections, reposition teleprompter | Use minimal head movement |
Frequently Asked Questions
How Do Teleprompter Sizes Affect Presenter Comfort During Long Recordings?
Choosing the right teleprompter size directly affects your comfort during long recordings. A properly sized teleprompter helps maintain ergonomic posture, reducing neck and eye strain. If it’s too small, you might lean forward or squint, increasing eye fatigue. Conversely, a larger screen allows you to read comfortably without straining your eyes or compromising your natural eye line, ensuring you stay relaxed and focused throughout extended sessions.
What Are the Best Practices for Syncing Teleprompter Text With Live Timing?
Think of syncing teleprompter text with live timing as conducting an orchestra. You’ll want to monitor your cues carefully, adjusting for voice modulation and script pacing so everything flows seamlessly. Use a reliable teleprompter software that offers real-time adjustments, rehearse with it, and make quick tweaks during recording. This guarantees your delivery stays natural, engaging, and perfectly synchronized with your timing, like a symphony in harmony.
How Does Ambient Lighting Influence Teleprompter Visibility and Readability?
Ambient lighting greatly influences teleprompter visibility and readability. In bright lighting conditions, you should increase the screen brightness to ensure the text remains clear and easily readable. Conversely, in dim environments, lower the brightness to prevent glare and eye strain. Properly balancing the lighting conditions with your teleprompter’s screen brightness helps you maintain focus and deliver your lines smoothly without distraction or difficulty.
Can Adjustable Teleprompters Improve Eye Contact Across Different Camera Setups?
Think of your teleprompter as a chameleon, adapting seamlessly to any scene. Adjustable teleprompters, with their flexible support and lens compatibility, let you fine-tune eye contact across different camera setups. You can position the screen perfectly, ensuring your gaze stays natural and engaging. This versatility helps you connect authentically with your audience, no matter the shot, making your delivery smooth and professional.
What Maintenance Is Required to Keep Teleprompters Functioning Smoothly?
To keep your teleprompter functioning smoothly, regularly perform screen calibration to make certain text displays correctly and remains clear. You should also clean the hardware, including the glass and any reflective surfaces, with a soft, lint-free cloth to prevent smudges and dust buildup. Check all connections and moving parts periodically, and update software as needed. Proper maintenance guarantees reliable performance and a professional presentation on camera.
Conclusion
Choosing the right teleprompter size and lens is like framing a perfect shot—every detail matters. When you align your eye-line naturally, it’s like a clear window to your audience, making your message authentic. Avoid common mistakes, and adjust for different environments, and your setup becomes seamless—a smooth conversation rather than a scripted performance. With the right tools and techniques, you create a visual connection that feels effortless, engaging, and genuine.