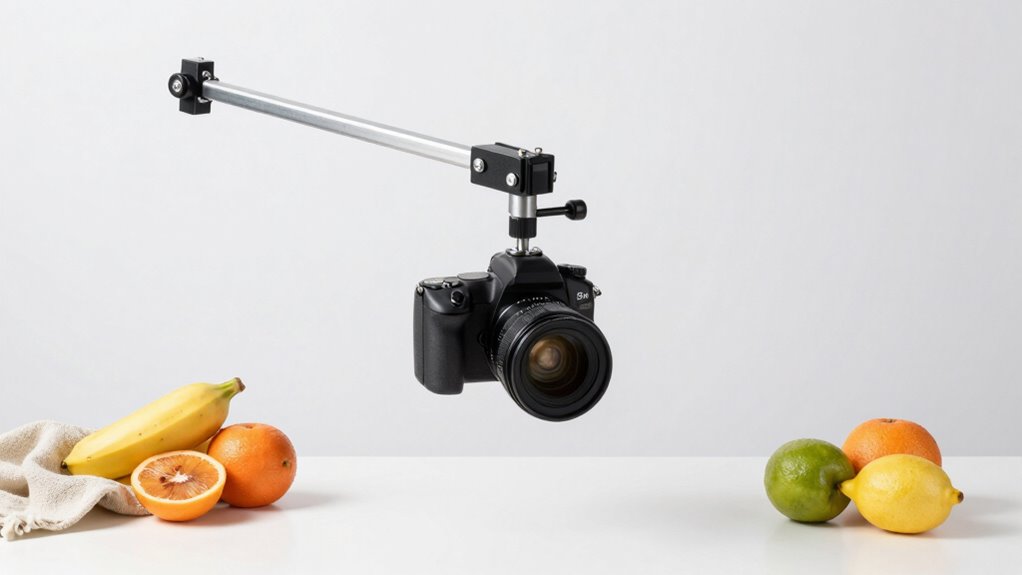
To prevent your overhead camera shot from drifting, you’ll need to use stability math by calculating your support’s center of gravity (CG). Balance the weights and distribute them evenly, especially at the base, to lower the CG and reduce wobble. Use sturdy materials and make sure your supports are on a flat, level surface. Tighten all hardware and test your setup before filming—keeping these principles in mind will help you build a rock-solid stand and keep your shot stable.
Key Takeaways
- Calculate the center of gravity (CG) by multiplying each weight by its distance from a reference point, then dividing the total moment by the total weight.
- Ensure weights are evenly distributed and positioned directly opposite the camera to maintain balance and prevent drift.
- Use a wider base and lower support height within recommended ranges (3-5 ft height, 12-24 in base) to enhance stability.
- Regularly tighten all joints, hardware, and clamps to prevent shifts during filming.
- Test stability on a level surface, applying gentle pressure to verify balanced weight distribution and secure support.
Why Stability Is Critical for Overhead Camera Shots
Stability is vital for overhead camera shots because even minor movements can distort the image and distract viewers. When setting your camera, the camera height plays a key role in maintaining stability; a higher position often requires a sturdier support to prevent wobbling. Material durability directly impacts how well the stand resists vibrations and external forces, ensuring steady footage. A stand made from durable materials like steel or high-quality aluminum can withstand weight shifts and accidental bumps, keeping the camera steady. If your stand isn’t stable enough, your shot may drift or jitter, ruining the professional look you’re aiming for. Choosing the right height and durable materials helps you achieve consistent, clear overhead shots without interruptions or distractions. Additionally, understanding the importance of contrast ratio can help you optimize your camera setup for the best image quality. Furthermore, incorporating innovative European cloud servers into your production workflow can enhance data security and streamline your editing processes, ensuring reliable performance throughout your project. To maximize stability, consider adjustable support systems that allow fine-tuning of your camera’s position for optimal balance and steadiness, and explore vibration damping techniques to further reduce any residual movement. Using a comprehensive approach that considers support structure design can significantly improve your shot stability and overall filming quality.
The Physics Behind Stable Overhead Camera Stands
Understanding the physics behind stable overhead camera stands helps you grasp why certain designs perform better. Camera vibration can cause unwanted movement, so sturdy structures minimize this by absorbing or deflecting vibrations. Material flexibility plays a key role; rigid materials reduce oscillations, keeping the camera steady. Conversely, overly flexible components can amplify vibrations, leading to drift. The balance lies in using materials that provide enough strength without excessive flexibility, ensuring stability under various conditions. The physics also involves understanding how forces distribute across the stand, preventing wobble or tipping. Additionally, considering material damping properties can further enhance stability by absorbing residual vibrations. Incorporating force distribution principles into your stand design ensures that weight and stress are evenly managed, reducing the likelihood of instability. Properly designed stands also account for center of gravity to maintain balance and prevent tipping. Paying attention to structural reinforcement techniques can help improve overall stability and resist external disturbances. By considering these factors, you can select or design a stand that resists vibration and maintains precise positioning, giving you smooth, drift-free shots. Ultimately, understanding these principles helps you optimize your setup for maximum stability. For example, selecting materials with appropriate damping characteristics can significantly improve overall steadiness.
How to Calculate Your Camera’s Center of Gravity for Stability
Calculating your camera’s center of gravity (CG) is essential for ensuring stability and balanced performance on your overhead stand. To do this, identify all components’ weights and their positions relative to a reference point. Measure the distance from this point to each part of your camera setup. Then, multiply each weight by its distance to find its moment. Sum these moments and divide by the total weight to find the center of gravity. Proper calculation reveals how the weight distribution affects stability, preventing drift or tipping. Knowing your camera’s center of gravity allows you to adjust support or add weights strategically, ensuring a balanced setup. Accurate CG calculation is a foundation for stable, drift-free overhead shots, giving you confidence during filming.
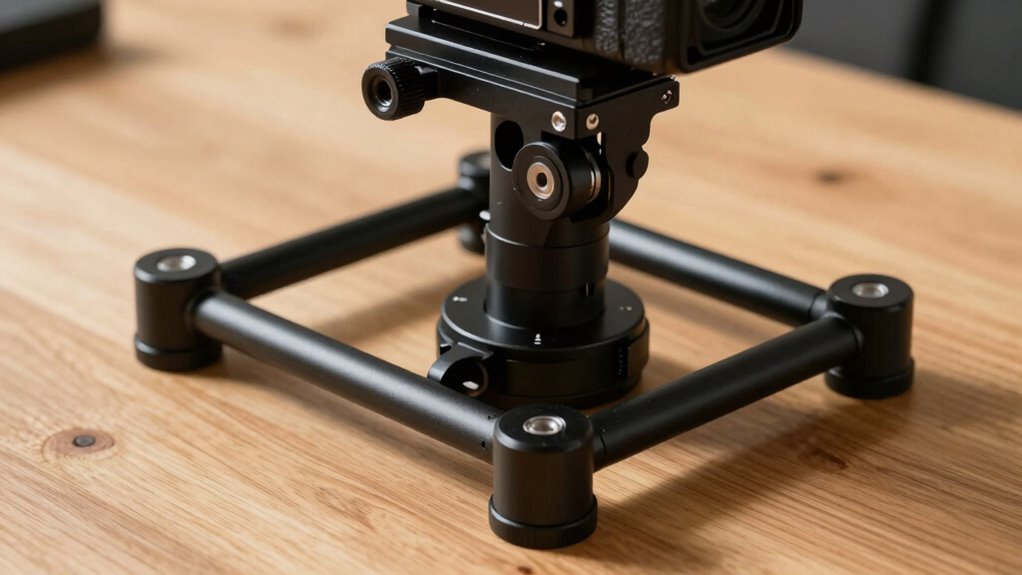
Choosing Support Materials and Weights for a Stable Setup
Choosing the right support materials and weights is essential to maintaining a stable overhead camera setup. Material selection impacts the stand’s durability and friction, while proper weight distribution prevents drift. To optimize stability, consider these key points:
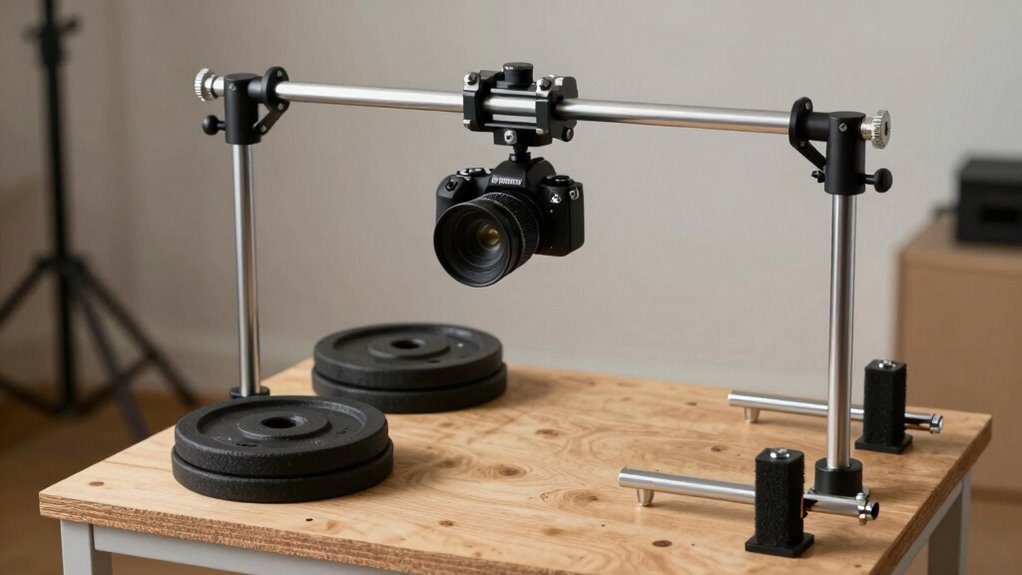
- Use dense, sturdy materials like steel or heavy-duty aluminum for the base to resist tipping.
- Distribute weight evenly across the support to lower the center of gravity, ensuring minimal sway.
- Incorporate additional weights at the base, such as sandbags or weights designed for stands, to increase stability and counteract any imbalance.
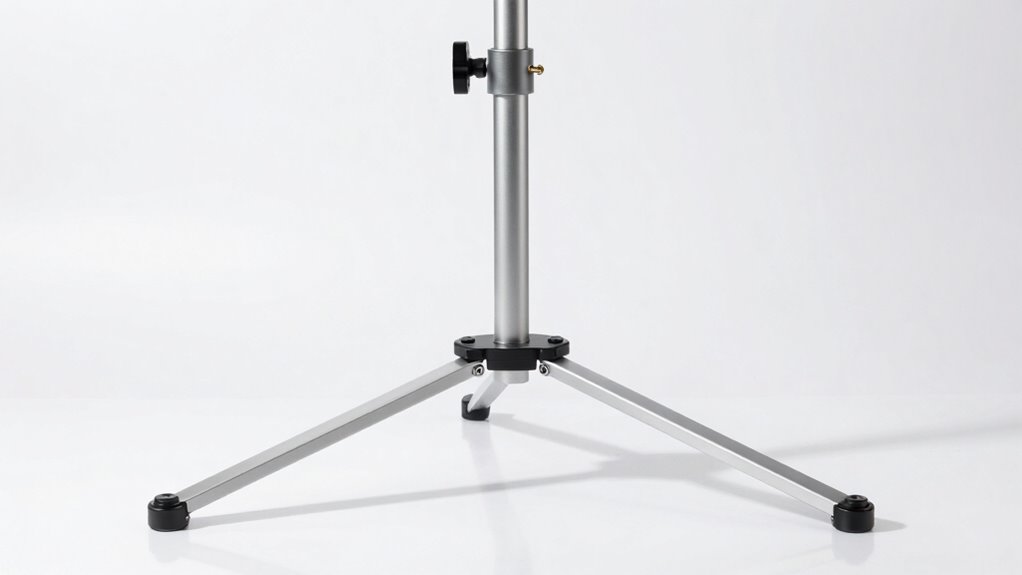
Designing Your Stand: Support Height and Base Width Tips
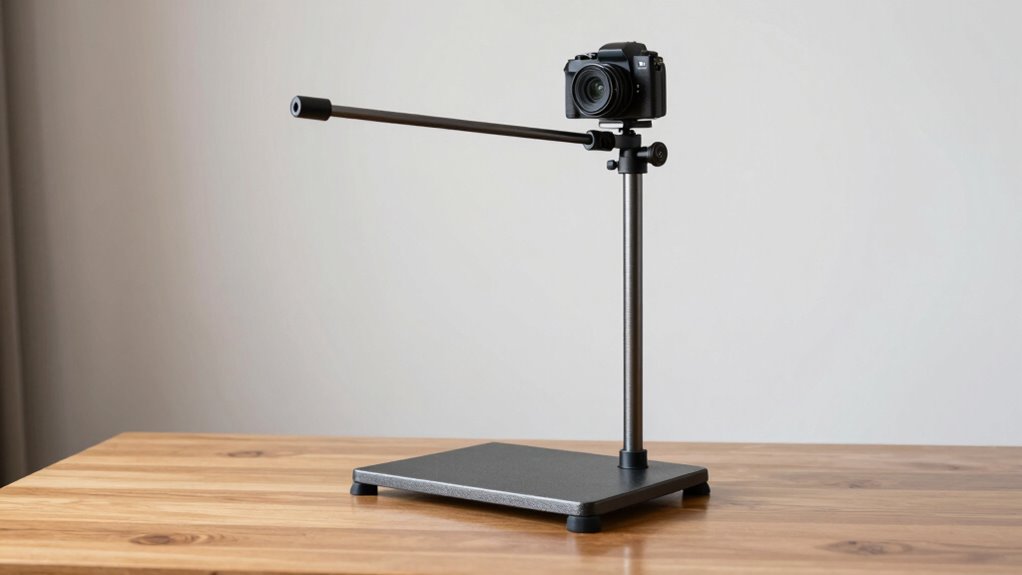
When designing your overhead camera stand, selecting the right support height and base width is key to achieving stability and ease of use. Proper material selection influences weight distribution, preventing drift. For height, aim for a balance: tall enough to capture your shot but not so high that it becomes unstable. A wider base increases stability by lowering the center of gravity and dispersing weight more effectively. Consider this setup:
| Support Height | Base Width |
|---|---|
| 3-5 feet | 12-24 inches |
| 5-7 feet | 18-30 inches |
| 7+ feet | 24+ inches |
Choosing sturdy materials like metal or dense wood enhances weight distribution, reducing wobble. Additionally, understanding the stability math behind support design can help you optimize your setup for maximum steadiness, even when adjusting support height. Incorporating proper weight distribution principles ensures your stand remains steady, even with varying support heights. Being aware of center of gravity concepts allows you to fine-tune your stand’s design for improved stability, especially at greater heights. Moreover, considering material selection can significantly impact overall stability and durability, making your setup more reliable. Understanding the load capacity of your materials and design further helps prevent wobbling or tipping, especially at taller heights. The right combination ensures your stand remains steady, even with varying support heights.
Fine-Tuning Your Setup: Adjustments for Maximum Stability
To guarantee your overhead camera stand remains stable during operation, you should make precise adjustments to its components and setup. Start by fine-tuning the camera angle to reduce any wobble or drift, ensuring the shot stays steady. Next, adjust your lighting setup carefully; uneven lights can cause shifts in focus or introduce vibrations. Additionally, ensuring all support joints are properly lubricated can help maintain consistent movement and prevent unnecessary looseness. Finally, check all fasteners and joints, tightening them as needed to minimize movement. Consider these key steps: 1. Confirm your camera angle is locked firmly, avoiding any accidental shifts. 2. Balance the lighting setup to prevent weight imbalances that could destabilize the stand. 3. Regularly inspect and tighten all support joints to maintain maximum stability during continuous shooting. 4. Ensure the support structure is properly assembled and positioned on a level surface to enhance overall stability. 5. Additionally, verifying the stability of the support system can help prevent any unforeseen shifts during use. Incorporating stability principles from equipment setup guides can further improve your setup’s reliability.
Common Mistakes That Cause Drift and How to Fix Them
One common cause of drift is using improper counterweights or not balancing the stand correctly. Loose mounting hardware or skewed adjustments can also lead to unwanted movement. Fixing these issues makes sure your camera stays steady and captures smooth footage. Additionally, ensuring the stand’s components are tightly secured and regularly inspected can prevent equipment instability, which is crucial for maintaining camera stability. Regularly checking counterweight distribution can help maintain balance and prevent shifts during filming. Recognizing the importance of pinball machine weight can also help when moving or installing stands that support overhead cameras, as understanding weight helps prevent tipping or shifting during setup. Proper understanding of technological influence on creativity can further inform how well your equipment setup supports innovative filming techniques. Moreover, considering the stability math behind your setup allows for more precise adjustments and improved shot consistency.
Improper Counterweight Use
Improper counterweight use is a common mistake that can cause your overhead camera to drift during filming. When counterweights are misplaced or unevenly distributed, it creates a support imbalance that affects stability. To prevent this:
- Ensure your counterweight is properly positioned directly opposite the camera, avoiding counterweight misplacement.
- Check that the weight amount matches the camera’s weight, maintaining balance.
- Regularly verify that the counterweight remains securely attached, preventing shifts during operation.
- Use stability principles to understand how proper weight distribution impacts overall support and minimizes drift. Additionally, practicing support balance techniques can help you achieve more consistent camera stability.
Misplacing counterweights shifts the center of gravity, leading to drift. An imbalance causes unnecessary strain on the stand’s components, increasing the risk of instability. Properly applying weight distribution is crucial for optimal stability, especially during extended shoots. Correctly using and securing your counterweights is essential for smooth, drift-free shots.
Loose Mounting Hardware
Loose mounting hardware is a leading cause of camera drift during filming. When your mounting hardware isn’t tightened properly, vibrations and small shifts become more likely, compromising shot stability. Over time, hardware can loosen due to regular use or environmental factors, making drift prevention difficult. To fix this, regularly check all mounting hardware for tightness before shooting sessions. Use appropriate tools to tighten screws, bolts, and clamps securely, but avoid over-tightening, which can damage components. Ensuring your hardware is snug helps maintain a steady camera position, preventing drift during critical shots. Consistent maintenance and vigilance with mounting hardware are essential for stable overhead shots and professional results. Properly secured hardware keeps your camera steady and minimizes unexpected movement.
Skewed Balance Adjustments
Skewed balance adjustments are a common mistake that leads to camera drift during overhead filming. When the weight isn’t evenly distributed, your stand experiences uneven load, causing instability. To fix this, make certain the load is balanced correctly. Here are three key tips:
- Check the center of gravity and shift the load to distribute weight evenly.
- Tighten all adjustment points to prevent shifts caused by skewed balance.
- Regularly inspect your stand for signs of uneven load, especially after adding or removing equipment.
How to Test and Verify Your Stand’s Stability

Start by ensuring your stand’s base is securely placed on a flat surface to prevent unexpected shifts. Next, check the weight distribution and balance to see if it remains steady when you gently apply pressure. These simple tests help confirm your stand’s stability before recording or filming.
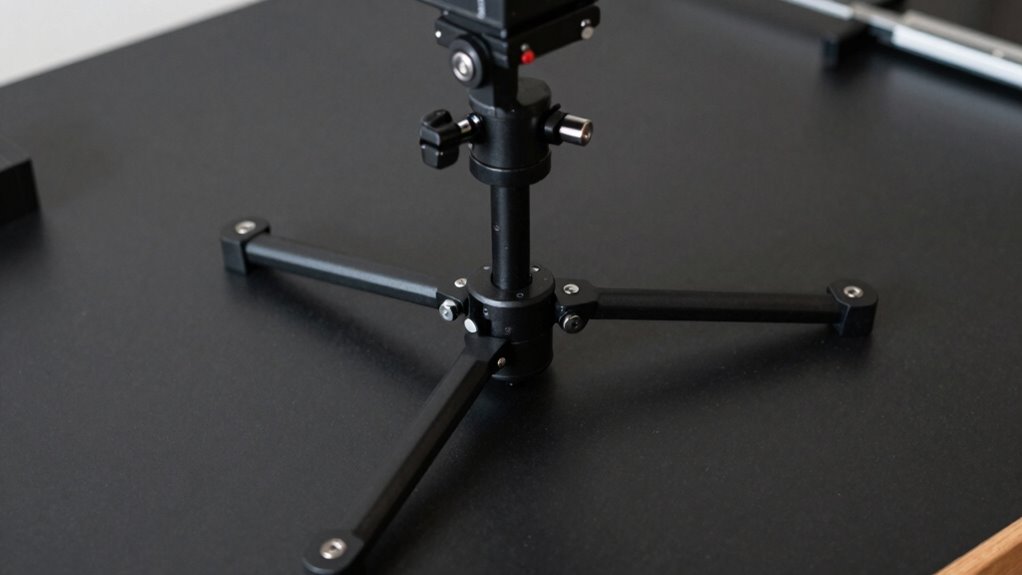
Secure Base Placement
Wondering how to guarantee your overhead camera stand stays secure during use? Proper placement of the base is key. First, verify the stand is on a level, stable surface to maintain the desired camera angle and lighting setup. Next, confirm that the base is positioned away from high-traffic areas to prevent accidental bumps. Finally, test the stand by gently applying pressure near the top, observing whether it wobbles or shifts.
To deepen your understanding:
- Confirm the surface can handle the stand’s weight without shifting.
- Check that all locking mechanisms are fully engaged.
- Reassess the camera angle after setup to ensure stability.
Secure base placement prevents drift and keeps your shot steady.
Weight and Balance Checks
After securing the base in a stable position, it’s important to verify that your overhead camera stand maintains proper weight distribution. Check for balance by gently shifting the stand side to side and front to back. This ensures lighting considerations don’t cause instability when adjusting camera angles. Use the table below to evaluate your stand’s weight distribution:
| Aspect | Action |
|---|---|
| Camera placement | Confirm weight is centered over the stand’s core |
| Added accessories | Ensure extra lights or monitors don’t unbalance |
| Stand tilt | Test tilt adjustments without wobbling |
| Overall stability | Confirm no drifting when making camera angle adjustments |
Proper checks prevent drift and help maintain steady shots, even with lighting changes or camera angle tweaks.
Expert Tips for Building a Rock-Solid Overhead Camera Stand
Building a sturdy overhead camera stand is essential for capturing stable, professional-quality footage, and the key to success lies in choosing the right materials and construction techniques. To guarantee your stand remains solid and prevents drift, focus on stability, adjustability, and compatibility with your camera angle and lighting setup.
- Use high-quality, heavy-duty materials like steel or aluminum for the frame to resist wobbling.
- Incorporate adjustable joints and fasteners to fine-tune the camera angle without compromising stability.
- Ensure your stand can support your lighting setup without shifting, maintaining a consistent shot.
Frequently Asked Questions
How Does Wind or Air Movement Affect Overhead Stand Stability?
Wind or air movement can considerably impact your overhead stand stability by causing unexpected airflow impact, which may lead to drift or wobbling. To counter this, you should implement wind mitigation strategies like securing the stand with weights or guy wires, and choosing sheltered locations. These measures help minimize airflow impact, ensuring your camera stays steady and your shot remains consistent despite environmental air movements.
Can Uneven Surfaces Compromise Your Camera Stand’s Stability?
Uneven surfaces can definitely compromise your camera stand’s stability. When the ground surface isn’t level, load distribution becomes uneven, causing the stand to wobble or drift. To avoid this, guarantee you place your stand on a flat, stable surface or use leveling accessories. Proper load distribution keeps your overhead camera steady, preventing unwanted shifts and ensuring your shot remains clear and professional.
What Are the Signs Your Overhead Stand Is Drifting?
You notice your shot subtly shifting, and you realize your overhead stand is drifting. The signs? Camera weight feels uneven, especially at higher stand heights, causing small but persistent movements. You might see your footage tilt or sway unexpectedly. If you ignore these cues, your shot could drift further, ruining the shot. Stay alert—adjust your stand and balance the camera weight to keep your footage steady and professional.
How Often Should You Recalibrate or Adjust Your Stand?
You should recalibrate your overhead stand weekly or whenever you notice drift. Regular calibration frequency keeps your shots steady and precise. Use adjustment tips like tightening bolts and checking weight distribution to maintain stability. If your stand feels wobbly or shifts unexpectedly, don’t wait—recalibrate immediately. Staying proactive with these adjustments ensures your camera stays steady, so your footage remains sharp and professional throughout your shoot.
Are There Specific Materials Better for Vibration Absorption?
Sure, choose materials like rubber or foam for vibration damping—they’re like shock absorbers for your stand’s nerve endings. Soft, flexible materials absorb vibrations better than rigid ones, ensuring your shot stays steady. Think of material selection as giving your camera stand a comfy cushion, preventing it from jittering like a nervous wreck. So, prioritize rubber or specialized damping pads to keep your footage smooth and perfectly aligned.
Conclusion
Did you know that a small wobble in your overhead camera stand can cause up to 15% distortion in your shots? By understanding the physics and applying proper stability techniques, you can eliminate drift and capture crystal-clear footage. Remember, investing a little time in calculating your center of gravity and choosing the right materials makes all the difference. With a stable setup, you’ll guarantee every shot stays perfectly steady, saving you time and frustration on every project.