
To set up your handheld rig for smoother footage, focus on balancing weight evenly across all components. Start by choosing lightweight lenses and positioning batteries close to the camera’s center of gravity. Adjust counterweights along the rig, shifting them until the setup feels stable and comfortable. Keep accessories close to the center and experiment with grip placement. Fine-tuning these elements helps reduce fatigue and enhances stability—stick with it, and you’ll discover how to master a balanced rig for smoother shots.
Key Takeaways
- Adjust counterweights along the rig to evenly distribute front and back weight for optimal balance.
- Position batteries and accessories close to the camera’s center of gravity to maintain stability.
- Experiment with grip placement and hand positioning to find a natural, balanced hold.
- Ensure all components are securely attached and properly aligned to prevent shifting during shoots.
- Regularly fine-tune the setup during filming to adapt to different shots and reduce operator fatigue.
Understanding the Key Components of Your Handheld Rig
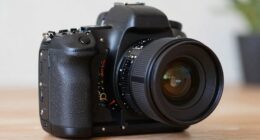
Have you ever wondered what makes a handheld rig effective for capturing steady footage? It all starts with understanding its key components. Camera ergonomics are vital because they influence how comfortably and securely you hold your rig, reducing fatigue and shaky shots. Pay attention to grip techniques—how you grip the rig impacts stability and control. A proper grip distributes weight evenly and minimizes strain on your hands and arms. The rig’s frame, handles, and mounts work together to support your camera while allowing flexibility in movement. Regularly practicing your prepping skills can also help you better manage your gear and adapt to different shooting conditions. Being aware of weight distribution principles can further enhance your setup by providing better balance and reducing fatigue during extended shoots. Incorporating reconditioning batteries into your setup ensures consistent power supply, which is essential for longer shoots and uninterrupted footage. Understanding the integration of AI features in your gear can further enhance your setup by providing real-time adjustments and stability assistance. Additionally, consulting with professionals or utilizing project management support can optimize your workflow and setup efficiency. Familiarizing yourself with these elements helps you operate your gear efficiently. When you understand how each component functions, you can adjust your grip and positioning to achieve smoother, more professional-looking footage.
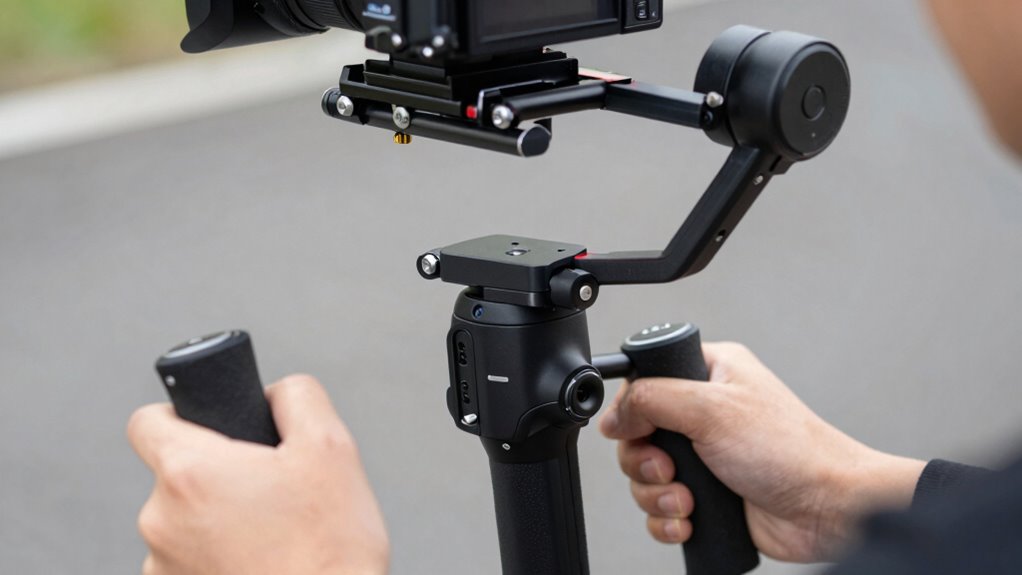
How to Assemble Your Rig for Best Balance

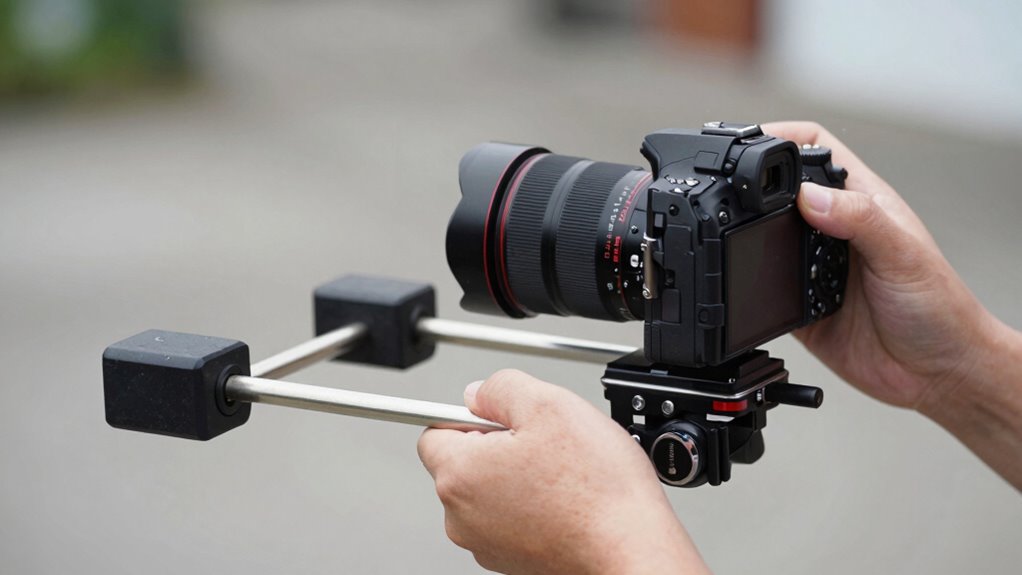
Achieving the best balance on your handheld rig starts with proper assembly, ensuring that weight is evenly distributed to reduce fatigue and improve stability. Begin by selecting a lens compatible with your setup, as heavier lenses can shift balance. Next, consider your battery options; choose lightweight, compact batteries to prevent top-heaviness. When assembling: 1. Attach your lens securely, ensuring its weight is aligned with the rig’s center. 2. Position batteries close to the camera body to maintain a low center of gravity. 3. Adjust counterweights along the rig to fine-tune balance, especially if your lens or accessories are unevenly weighted. Additionally, understanding how weight distribution impacts handheld stability can help you make better adjustments for smoother footage. Being aware of balance techniques can further enhance your shooting experience and reduce operator fatigue. Incorporating ergonomic considerations into your setup can also lead to longer, more comfortable filming sessions. Moreover, experimenting with rig configurations can help you find the optimal setup tailored to your specific gear and shooting style.
Balancing Your Rig for Stability and Comfort

To guarantee your handheld rig remains stable and comfortable during shoots, you need to focus on proper balancing. This enhances camera stabilization and ensures ergonomic design, reducing fatigue. Start by adjusting the position of your camera and accessories until the rig feels centered with minimal effort. Proper balance minimizes strain on your arms and improves footage quality. Use the following checklist to optimize your setup:
| Component | Adjustment Tips | Effect on Stability |
|---|---|---|
| Camera placement | Center it over the support arm | Better camera stabilization |
| Counterweights | Distribute evenly to counteract tilt | Enhanced balance and comfort |
| Handgrip position | Adjust for a natural grip | Improved ergonomics |
| Accessories | Keep weight close to the center | Less strain, smoother footage |
Achieving proper rig balance creates a more ergonomic design, making shooting longer and easier. Properly balancing the rig can also help prevent long-term strain or injury during extended filming sessions.
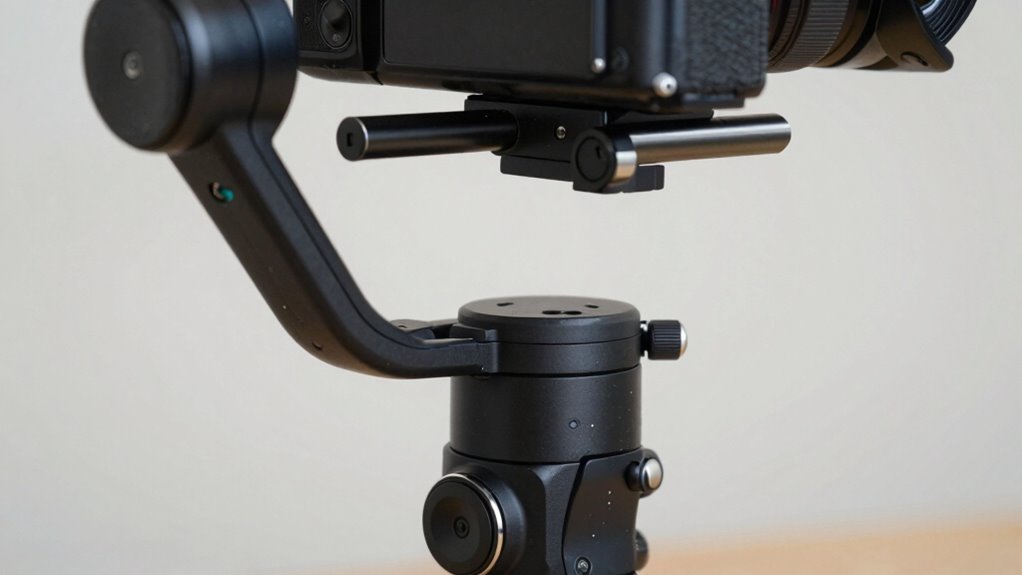
Managing Counterweights and Accessories for Optimal Balance
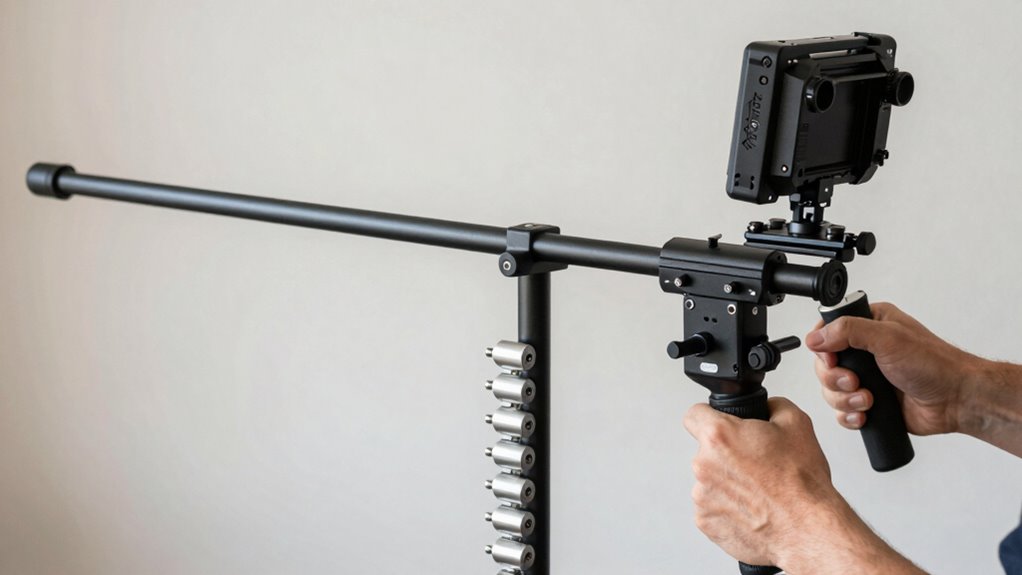
Managing counterweights and accessories effectively is essential for maintaining ideal balance in your handheld rig. Proper counterweight placement ensures the rig feels stable and comfortable to hold, preventing fatigue. When managing accessories, keep weight distribution in mind to avoid shifting the center of gravity. Here are three tips to help you optimize your setup:
- Adjust counterweight placement along the rod to balance front and back weight distribution.
- Use lightweight accessories where possible to prevent unnecessary strain.
- Regularly check and secure all accessories to prevent shifts during filming.
Troubleshooting Common Rig Balance Issues

When your rig feels off-balance, start by identifying what’s causing the imbalance. Check your counterweights and adjust them as needed, then fine-tune your grip position for better stability. Small tweaks can make a big difference in achieving a smooth, balanced shot. Additionally, consider how Free Floating techniques can help distribute weight more evenly for enhanced control. Incorporating ergonomic design principles can further improve handling and reduce fatigue during extended shoots. Exploring smart equipment options can also assist in maintaining consistent balance through integrated weight management features, which often utilize adjustable counterweights for precise control. Understanding the importance of vetted gear can ensure your setup remains reliable and safe during operation.
Identifying Imbalance Sources
Imbalance issues often stem from misaligned or uneven weight distribution across your rig components. To identify the source, start by checking the camera weight—if it’s too heavy or unevenly supported, the rig becomes unbalanced. Next, examine the grip tension; if your grip isn’t secure or is too tight, it can shift the rig’s center of gravity. Lastly, look at how components like batteries or accessories are arranged; uneven placement can cause tilt or wobble. Adjusting these factors helps you pinpoint the root cause of imbalance. Remember, small differences in weight or tension can considerably affect handling, so be thorough when inspecting each element. Proper identification makes balancing much easier and leads to smoother footage.
Adjusting Counterweights Properly
Have you checked if your counterweights are correctly positioned? Proper counterweight placement is key to balanced footage. If your rig feels front- or back-heavy, adjust the weights along the vertical and horizontal axes. To avoid accessory management issues, ensure all accessories are secured and accounted for, as they can affect balance. Use this quick guide:
| Position | Effect on Balance | Adjustment Tip |
|---|---|---|
| Front | Tilts downward | Move weights toward the rear |
| Rear | Tilts upward | Shift weights forward |
| Top | Lifts vertically | Lower weights or add counterweights |
| Side | Causes side tilt | Distribute weights evenly side to side |
| Horizontal | Imbalance along the length | Slide weights closer to or away from center |
Additionally, proper weight distribution is essential for achieving smooth, professional footage and reducing strain during extended shoots. Fine-tuning counterweight placement maintains your rig steady, making accessory management seamless. Properly balanced rigs also help prevent operator fatigue, ensuring you can work comfortably over long periods. Keeping the weight distribution correct not only improves footage quality but also extends the longevity of your equipment.
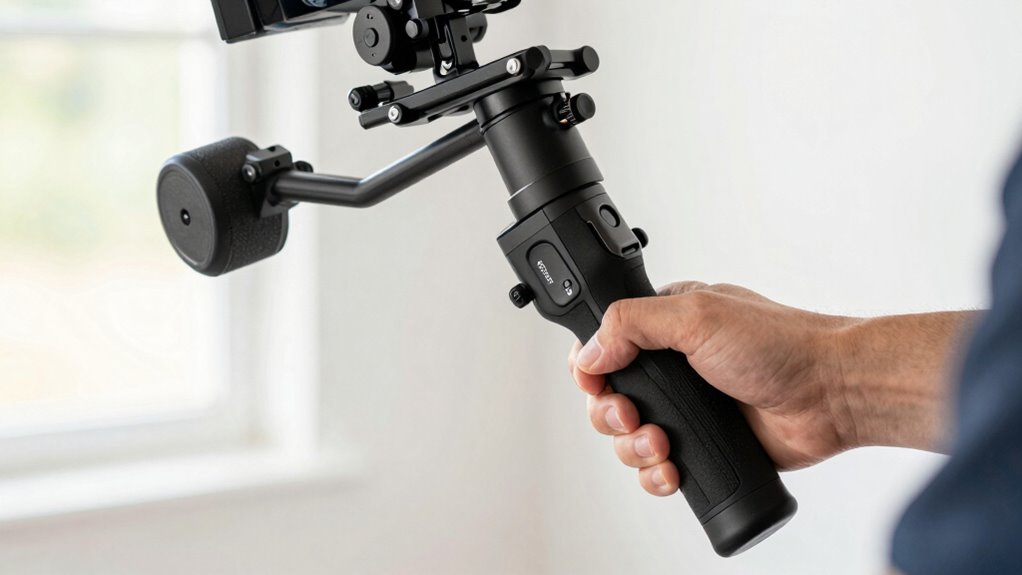
Fine-Tuning Grip Position
Adjusting your grip position can considerably improve your rig’s balance and handling. Proper grip positioning helps distribute weight evenly, reducing fatigue and unwanted movement. To fine-tune your hand placement:
- Shift your grip slightly forward or backward along the rig to find a comfortable balance point.
- Use both hands to grip the rig firmly but naturally, avoiding tension that causes shaky footage.
- Experiment with different hand placements to see which position offers the most stability and control.
- Maintaining consistent grip pressure can also help prevent unwanted movement during filming.
Fine-Tuning Your Rig During a Shoot for Smooth Footage
To guarantee your footage remains smooth, you’ll need to make real-time adjustments as you shoot. Pay attention to your camera ergonomics, ensuring your grip stays comfortable and balanced. If you notice any strain or instability, reposition your hands or adjust your stance to maintain control. Check accessory compatibility—sometimes, small tweaks like repositioning a monitor or counterweight can notably improve stability. Keep your rig’s weight distribution even, shifting components slightly if needed to reduce wobble. Regularly re-evaluate your setup during shooting to prevent fatigue or imbalance from affecting footage quality. Additionally, understanding the tools and gear you’re using can help you better optimize your setup for stability. By staying attentive to these details, you’ll maintain smooth camera movement and achieve professional results without stopping your shoot.
Tips to Reduce Fatigue and Improve Shooting Comfort
Shooting handheld for extended periods can quickly lead to fatigue, which compromises both comfort and footage quality. To improve your shooting experience, focus on optimizing camera ergonomics and applying effective handheld techniques.
Here are three tips:
- Adjust your grip: Use both hands with a relaxed grip to reduce strain and distribute weight evenly.
- Maintain proper posture: Keep your elbows close to your body and avoid hunching to lessen muscle fatigue.
- Take regular breaks: Shift your stance or rest briefly to prevent muscle tension from building up.
Implementing these tips keeps your camera ergonomics in check, making long shoots less tiring and enhancing your overall footage stability and quality.
When and How to Get Professional Help With Rig Balance

If your rig feels unsteady or causes persistent fatigue, it’s time to seek professional help. Recognizing signs like uneven weight distribution or discomfort can save you time and improve your shots. Knowing when to hire experts ensures your rig is perfectly balanced for ideal performance. Proper cable management and understanding of load distribution are essential components of a well-balanced setup. Additionally, consulting with experienced rig technicians can provide insights into ergonomic adjustments that enhance comfort and stability. Ensuring your setup respects precious metals investment principles can also contribute to a more stable and efficient rig configuration. Paying attention to load balancing techniques can further optimize your rig’s performance and longevity. Being aware of alarm clock reviews can help you stay alert and punctual during long shooting days, ensuring you remain focused and ready for each shot.
Recognizing Balance Issues
Balance issues with your handheld rig can often be subtle at first, but ignoring them can lead to shaky footage and increased fatigue. Recognizing these signs early helps you adjust and improve your camera ergonomics. Look out for:
- Wobbly or unsteady footage that doesn’t feel smooth.
- Fatigue or discomfort in your arms, shoulders, or grip techniques after short periods.
- Difficulty maintaining consistent framing or control during shots.
If you notice any of these, it’s time to reassess your rig’s balance. Properly balanced gear reduces strain and improves stability. Pay attention to how your body feels and how the footage looks. Addressing these issues early keeps your shots steady and your grip techniques effective. When in doubt, consult a professional for a thorough assessment.
When to Hire Experts
When you notice persistent wobbles, discomfort, or difficulty maintaining control despite adjusting your rig, it’s time to contemplate professional assistance. Expert rig technicians can optimize your setup, ensuring proper balance for smooth footage. They can help you refine camera angles, making sure your shots stay steady, even during dynamic movements. Additionally, professionals can advise on lighting techniques that complement your rig’s stability, reducing strain and enhancing shot quality. If you find yourself constantly readjusting or feeling fatigued, it’s a sign you might need specialized help. Investing in expert guidance not only improves your footage but also saves time and prevents potential injury. Ultimately, hiring professionals ensures your handheld rig operates at peak performance, giving you the confidence to focus on creative aspects.
Frequently Asked Questions
How Do Different Camera Types Affect Handheld Rig Balance?
Different camera types affect handheld rig balance because sensor weight and lens size vary. Heavier sensors, like full-frame, need more counterbalance, while smaller sensors are lighter. Larger lenses add front weight, making balancing trickier. You’ll need to adjust the rig accordingly, using counterweights or repositioning components, to guarantee smooth footage. Understanding your camera’s sensor weight and lens size helps you achieve ideal balance for steadier shots.
What Accessories Can Improve Overall Rig Stability?
You can improve your rig stability by adding counterweights, which help balance the camera and guarantee fatigue. Grip enhancements like padded or textured handles give you better control, preventing slips and unwanted movements. Combining counterweights with ergonomic grips assures smoother footage and greater comfort during long shoots. Experiment with different configurations to find the perfect balance, making your handheld shots steadier and more professional.
How Often Should I Check and Adjust Rig Balance During a Shoot?
You should check and adjust your rig balance regularly during a shoot, ideally every 15 to 30 minutes, especially if you’re moving around or changing accessories. This helps with rig maintenance and guarantees smooth footage. Keep an eye on any shifts or uneven weight distribution, and perform quick balance recalibrations as needed. Frequent checks prevent fatigue and maintain peak stability, so your shots stay steady and professional throughout your shoot.
Are There Specific Techniques for Balancing Heavy Camera Rigs?
Balancing heavy camera rigs can seem intimidating, but focusing on proper weight distribution and an ergonomic grip makes it manageable. Start by adjusting counterweights to guarantee even balance, keeping the center of gravity aligned with your body. Use your ergonomic grip to maintain control, and check the balance frequently during your shoot. This approach minimizes fatigue and produces smoother footage, even with heavy equipment.
How Can I Customize My Rig for Different Shooting Environments?
To customize your rig for different environments, start by adjusting the weight distribution to suit your shooting conditions. Use ergonomic grips to enhance comfort and control, especially during extended shoots. You can add or remove weights or reposition components to balance the rig better. This flexibility guarantees smoother footage and reduces fatigue, making your setup adaptable whether you’re shooting indoors, outdoors, or in tight spaces.
Conclusion
Mastering your handheld rig is like tuning a musical instrument—you need the right balance to hit all the right notes. With patience and practice, you’ll turn shaky footage into smooth, cinematic shots. Remember, a well-balanced rig isn’t just about stability; it’s about making your shooting experience comfortable and effortless. Keep fine-tuning, stay attentive to details, and soon you’ll be gliding through your shoots like a professional. Your steady hand will tell the story with clarity and grace.