
When shooting action in low light, your camera’s settings matter more than its specs. Focus on adjusting ISO carefully to boost brightness without adding noise, increase exposure via shutter speed, and set white balance to match your environment for natural colors. Fine-tuning noise reduction and exposure guarantees clear footage even in dark conditions. Mastering these settings can vastly improve your results—keep going to discover how to optimize each one for the best night action shots.
Key Takeaways
- Adjust ISO gradually to balance brightness and noise, with higher ISO for low light but minimal grain.
- Use slower shutter speeds to increase exposure, ensuring stability to avoid motion blur.
- Set wider aperture (lower f-number) to allow more light entry, improving image clarity in dark conditions.
- Enable noise reduction features to minimize grainy footage without sacrificing too much detail.
- Optimize white balance settings to maintain accurate colors under varying low-light lighting sources.
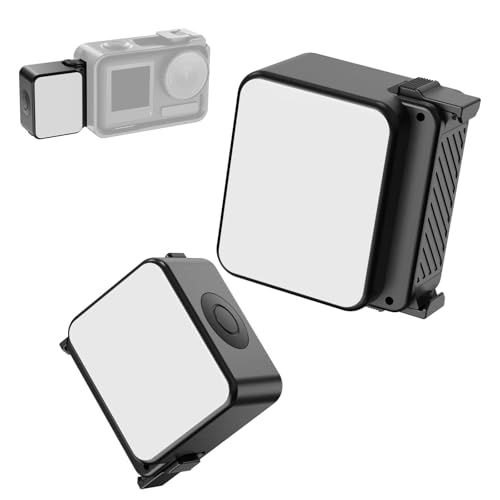
ULANZI LM18 Vlogging Light Mini LED Action Camera Video Light Magnetic Photography Fill Lighting for DJI Osmo Nano Action 3/4 Camera Cage Accessories, Xtra, Ulanzi PK-06 Pocket 3/4 Expansion Adapter
Widely Compatible: LM18 mini Led video lights designed for DJI Osmo Action 5/4/3 & Pocket 3 (requires adapter…
As an affiliate, we earn on qualifying purchases.
As an affiliate, we earn on qualifying purchases.
Why Camera Settings Matter More Than Hardware in Low-Light Shooting
While having advanced hardware can help, your camera settings play a crucial role in low-light conditions. Your lens choice dramatically impacts how much light enters your camera; wider lenses with larger apertures let in more light, improving image quality. However, adjusting settings like exposure and shutter speed is equally important. These settings determine how well your camera captures dim scenes without too much noise or blur. Keep in mind that using longer exposures can drain your battery faster, so monitor your battery life closely. Proper exposure control is essential for capturing clear images in low-light environments. Additionally, utilizing noise reduction features can significantly improve image clarity in challenging lighting. Optimizing your camera’s settings ensures you make the most of your hardware’s capabilities. Remember, even the best hardware won’t compensate for poor settings. Mastering these adjustments allows you to shoot clearer, brighter footage in low light, regardless of your camera’s specs. Sensor efficiency can also help you make more informed choices about your camera’s performance in low-light situations.

4K Mini Body Action Cameras POV Body Cam, 64GB Sports Camera with Audio Video Recording, Portable WiFi Magnetic Wearable Waterproof Thumb Camera for Motorcycle Vlogging Skiing Cycling Hiking-Black
【Ultra Wide 4K Action Camera with Steady Video】This mini body camera with audio and video recording supports 4K/30FPS…
As an affiliate, we earn on qualifying purchases.
As an affiliate, we earn on qualifying purchases.
What Is ISO and How to Set It for Night Shots
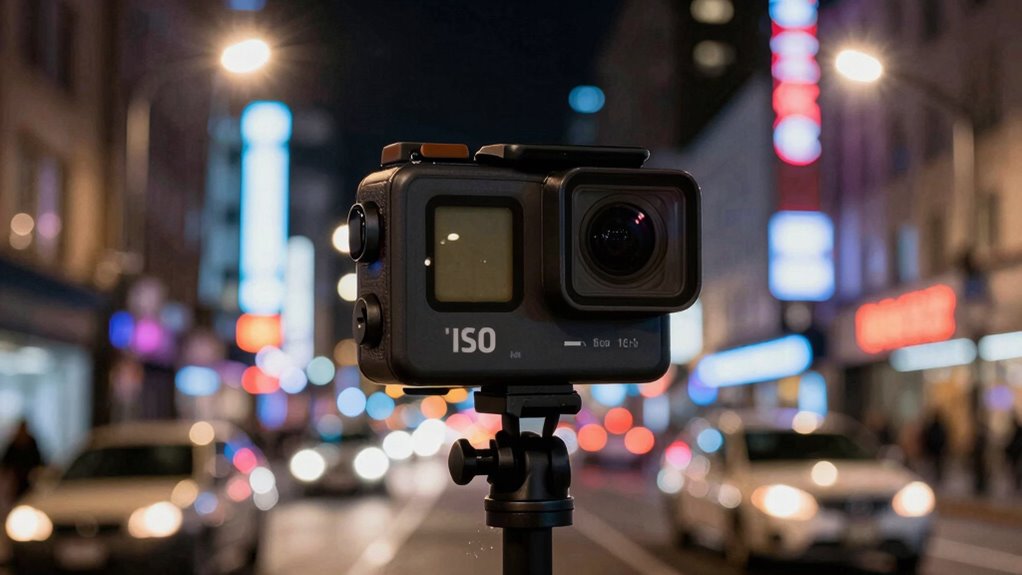
ISO controls how sensitive your camera is to light, which is essential for capturing clear night shots. You’ll need to adjust the ISO setting carefully to get the right balance between brightness and noise. Understanding how to set ISO properly helps you avoid grainy images while ensuring your shots are well-lit. Additionally, recognizing the reliable, well-researched principles behind ISO settings can improve your overall photographic results. Proper camera maintenance and understanding the impact of environmental factors can also influence your ISO choices for better low-light images. Consulting with experienced photographers or referencing trusted sources can provide further insights into optimal ISO adjustments for various conditions. Being aware of the Gold IRA markets can also help you understand the importance of strategic planning and careful management, which parallels how you should approach camera settings for challenging lighting situations.
Understanding ISO Basics
Ever wondered how your action camera captures clear footage in low light? It all comes down to understanding ISO basics. ISO controls your camera’s sensitivity to light. When shooting at night, increasing ISO allows your camera to brighten the image, but it can also introduce grain or noise. The sensor size plays a role—bigger sensors handle higher ISO settings better, producing cleaner images. Similarly, lens aperture affects light intake; a wider aperture lets in more light, reducing the need for high ISO. Knowing how ISO interacts with your camera’s sensor size and lens aperture helps you find the right balance. Instead of relying solely on specs, mastering ISO adjustments guarantees sharper, clearer night shots with minimal noise.
Adjusting ISO Settings
Adjusting ISO settings correctly is essential for capturing clear night shots with your action camera. Higher ISO increases your camera’s sensor performance in low light, making dark scenes brighter. However, cranking up ISO also introduces noise, so find a balance that maintains image quality. When setting ISO, consider the lens aperture; a wider aperture allows more light in, reducing the need for high ISO. If your camera offers manual ISO control, start with a low setting and gradually increase until the scene is adequately exposed. Keep in mind that different lighting conditions demand different ISO levels. The goal is to maximize sensor performance without sacrificing image clarity, especially in low-light environments where every detail counts. Proper ISO adjustment is key to capturing sharp, noise-free images in challenging lighting. Additionally, understanding sensor performance can help you make better decisions on ISO settings for various night shooting scenarios.
Balancing Noise and Brightness
Have you ever wondered how to get the perfect balance between brightness and noise in your low-light shots? Achieving this depends on understanding ISO and how it interacts with your camera’s sensor performance and lens aperture. Higher ISO boosts brightness but introduces more noise, especially if your sensor isn’t optimized for low light. To find the right balance:
- Use the lowest ISO possible to minimize noise.
- Increase ISO gradually until the scene is adequately lit.
- Keep lens aperture wide to maximize light intake.
- Be mindful of your camera’s sensor performance at higher ISO levels.
- Adjust other settings like shutter speed to prevent overexposure.
- Remember that home charging strategies can help ensure your camera gear is always ready, just like your EV’s battery, so you don’t miss critical shots due to power issues.
ULANZI LM18 Vlogging Light Mini LED Action Camera Video Light Magnetic Photography Fill Lighting for DJI Osmo Nano Action 3/4 Camera Cage Accessories, Xtra, Ulanzi PK-06 Pocket 3/4 Expansion Adapter
Widely Compatible: LM18 mini Led video lights designed for DJI Osmo Action 5/4/3 & Pocket 3 (requires adapter…
As an affiliate, we earn on qualifying purchases.
As an affiliate, we earn on qualifying purchases.
How to Use Shutter Speed for Brighter, Clearer Footage
Adjusting your shutter speed is key to capturing brighter, clearer footage in low light. You need to balance it with your ISO and aperture settings to avoid overexposure or blur. Properly setting your shutter speed guarantees your footage stays sharp and well-lit.
Adjust Shutter Speed Properly
To capture brighter, clearer footage in low light, mastering shutter speed is essential. Properly adjusting shutter speed helps control motion blur and exposure, making your footage sharper and brighter. When setting shutter speed, consider these tips:
- Use a slower shutter speed to let in more light, but beware of increased motion blur.
- Increase shutter speed for fast-moving scenes to freeze motion and reduce blur.
- Balance shutter speed with ISO to prevent grainy footage.
- Experiment with slightly longer exposures for static shots to boost brightness.
- Keep in mind that too slow a shutter speed can make footage look smeared, while too fast can underexpose the shot.
- Understanding camera sensors can help you better predict how different shutter speeds will impact low-light footage. Adjusting shutter speed skillfully allows you to optimize low-light conditions and achieve clearer, more vibrant footage.
Balance Exposure Settings
Balancing exposure settings is essential for capturing bright, clear footage in low light, and shutter speed plays a key role in this process. A faster shutter speed reduces motion blur but limits light intake, while a slower shutter lets in more light for brighter images. Keep in mind that sensor size and lens aperture also affect exposure; larger sensors and wider apertures gather more light, making it easier to shoot in dim conditions. Adjusting shutter speed based on these factors helps achieve best brightness without sacrificing clarity. Use the table below to understand how different shutter speeds interact with sensor size and lens aperture:
| Shutter Speed | Effect in Low Light | Best for |
|---|---|---|
| 1/60 sec | Moderate brightness | Slight motion, daylight |
| 1/30 sec | Brighter footage | Still-shots, low light |
| 1/15 sec | Brightest, risk blur | Static scenes |
| 1/8 sec | Max brightness, blur risk | Night shots, tripod |
Additionally, understanding how exposure triangle components work together can greatly improve your low-light footage quality.

Action Camera 4K 30FPS Waterproof Camera Underwater 131FT with EIS WiFi App Remote Control 64GB Card 170° Wide Angle Sports Helmet Bike Video Black
Stunning 4K30FPS Video & 30MP Image – Ultra HD Action Camera 4K Experience: Capture crystal-clear visuals with 4K30FPS…
As an affiliate, we earn on qualifying purchases.
As an affiliate, we earn on qualifying purchases.
White Balance Tips for Accurate Colors in Low Light
In low light conditions, getting the white balance right is essential for capturing accurate colors. Proper white balance ensures your images reflect true hues, avoiding overly warm or cool tones. To improve color accuracy, consider these tips:
Getting white balance right in low light ensures accurate, natural colors in your photos.
- Use auto white balance as a starting point, but manually adjust if colors seem off.
- Set white balance to a specific Kelvin value matching your lighting (e.g., 3200K for tungsten).
- Avoid mixing different light sources to prevent color casts.
- Use a gray card or white reference in your shot to calibrate white balance.
- Check your camera’s preview to confirm colors look natural before recording.
- Additionally, understanding how electric power generation impacts perception can help in assessing how lighting and color accuracy affect viewer engagement. Being aware of how lighting conditions influence color rendition can further refine your camera settings for better results. Recognizing the effects of lighting on perceived color accuracy can help you optimize your setup for the most natural-looking footage.
Adjusting Noise Reduction for Cleaner Night Videos
When shooting in low light, noise can quickly ruin the quality of your video, but adjusting noise reduction settings can considerably improve clarity. By fine-tuning noise reduction, you minimize graininess without sacrificing detail. Keep in mind, higher noise reduction may slightly reduce image sharpness, so find a balance that preserves clarity. Good noise reduction also complements image stabilization, resulting in smoother, cleaner footage. Here’s a quick guide:
| Noise Reduction Level | Impact on Image Quality | Recommended Use |
|---|---|---|
| Low | Less smoothing, more noise | Bright conditions |
| Medium | Balanced noise and detail | Moderate low light |
| High | Smoother images, less noise | Very low light |
| Max | Minimal noise, potential softening | Night video |
| Off | No noise reduction, grainy | Bright environments |
Adjust accordingly for ideal results.
How to Fine-Tune Exposure Settings in Dim Conditions

Adjusting noise reduction settings helps improve image clarity in low light, but fine-tuning exposure is just as important for capturing clear footage. To do this effectively, consider your camera’s sensor performance and lens aperture. A wider lens aperture lets in more light, reducing the need for high ISO settings that can cause noise. Adjust exposure manually, balancing shutter speed and ISO to prevent motion blur or graininess. Keep in mind that a slower shutter speed allows more light but may cause motion blur if you’re moving. Use your camera’s histogram to ensure proper exposure without clipping highlights or crushing shadows. Small tweaks can make a significant difference in dim conditions, ensuring your footage stays sharp and well-lit. Additionally, understanding the concept of Free Floating can help you optimize camera stability during handheld shooting in low-light environments. Being aware of sensor performance can guide you in selecting the right settings for your specific camera model, especially in challenging lighting scenarios. Furthermore, field‑of‑view considerations influence how much of the scene you capture, which can impact exposure decisions in dim environments. Recognizing the importance of noise reduction techniques can aid in managing image quality and graininess during editing or in-camera processing.
Before and After: Low-Light Setting Examples
Seeing the difference between poorly lit footage and well-exposed shots can be eye-opening. Proper settings, like adjusting lens filters and managing battery life, can dramatically improve low-light results. Using a lens filter reduces glare and enhances contrast, making details pop. Keep in mind, low-light shooting drains battery faster, so optimizing power settings is vital. Additionally, selecting the right camera settings can make all the difference in capturing quality footage. Adjusting ISO sensitivity appropriately helps balance exposure without introducing unnecessary grain. Properly managing battery life ensures you can shoot longer without interruptions. Being aware of how passive voice can subtly affect clarity and engagement is also important when crafting clear instructions or descriptions. Understanding the impact of lighting conditions helps in planning better shots and selecting appropriate settings. Here’s a quick comparison:
| Aspect | Before | After |
|---|---|---|
| Clarity | Grainy, dull | Sharp, detailed |
| Brightness | Underexposed | Well-lit, balanced |
| Color Accuracy | Faded | Rich, true-to-life |
| Glare Reduction | None | Improved clarity |
| Battery Life | Short | Managed with settings |
These examples show how small tweaks make a big difference.
Troubleshooting Common Low-Light Shooting Problems
Low-light conditions often cause action cameras to produce noisy, blurry, or poorly exposed footage, making it challenging to capture clear images in dim environments. To troubleshoot these issues, start with lens maintenance—clean your lens regularly to prevent smudges that reduce clarity. Make certain your battery is fully optimized; a low battery can limit camera functions like stabilization and ISO. Adjust your camera settings: increase ISO, slow down shutter speed, and enable night modes if available. Use a tripod or stable surface to avoid motion blur. Also, consider adding external lighting or improving your environment’s lighting. These steps help improve image quality and reduce common low-light problems, allowing you to capture sharper, clearer footage even in challenging conditions.
Final Tips for Shooting Better Night Action Footage
To capture better night action footage, focus on planning your shots carefully. Ensure your action camera’s lens compatibility suits low-light conditions, and verify that its waterproof features protect against unexpected splashes or rain. Use a tripod or stabilizer to prevent shaky footage, and manually adjust settings like ISO and shutter speed for ideal brightness. Familiarize yourself with your camera’s lens options to maximize clarity.
| Tip | Why it matters | How to implement |
|---|---|---|
| Check lens compatibility | Ensures clarity and low-light performance | Use lenses designed for night shooting |
| Use waterproof features | Protects your gear in adverse conditions | Opt for waterproof action cameras |
| Stabilize your shot | Prevents motion blur | Use mounts or tripods |
| Adjust ISO manually | Fine-tunes brightness without noise | Set ISO to a higher but manageable level |
| Plan your angles | Maximizes lighting and framing | Scout locations beforehand |
Frequently Asked Questions
Can External Accessories Improve Low-Light Footage Quality?
Yes, external accessories can improve low-light footage quality. Using a larger sensor size with external lenses allows more light to reach the sensor, enhancing image clarity. Additionally, external image stabilization devices help reduce blurriness caused by hand movement in low-light conditions. These accessories work together to boost your footage’s brightness and stability, making your recordings clearer and more professional, even in challenging lighting environments.
How Does Lens Aperture Affect Night Shot Clarity?
Imagine capturing the night’s magic—your lens aperture size plays a pivotal role. A wider aperture (smaller f-number) lets in more light, dramatically enhancing night shot clarity. Your lens quality guarantees this light is crisp and detailed. When you choose a lens with a larger aperture, you’re giving your camera the gift of brilliance in low-light conditions, turning darkness into stunning visuals that truly stand out.
Are There Recommended Shooting Modes for Low-Light Action Videos?
For low-light action videos, you should use manual focus to keep your shot sharp and avoid focus hunting in dim conditions. Enable image stabilization to smooth out shaky footage caused by movement. Adjust your camera’s ISO to a higher setting, but don’t overdo it to prevent noise. Combine these settings with a stable mount or gimbal, and you’ll capture clearer, more professional low-light action videos.
What Post-Processing Techniques Enhance Night Footage?
To enhance your night footage, focus on noise reduction techniques and adjusting sensor sensitivity in post-processing. Use software like Adobe Premiere or DaVinci Resolve to reduce graininess and smooth out noise. You can also tweak brightness and contrast to bring out details in low-light scenes. These steps help improve clarity, making your footage look sharper and more vivid, even in challenging lighting conditions.
How Do Weather Conditions Impact Low-Light Camera Performance?
Weather conditions directly impact your low-light camera performance. Fog, rain, or snow reduce sensor sensitivity, making it harder to capture clear images. Plus, moisture can cause lens fogging and affect image stabilization. To get better results, guarantee your camera has good sensor sensitivity settings and use stabilization features. Protect your gear from weather elements, and adjust exposure or ISO to adapt to changing conditions for clearer, sharper footage.
Conclusion
Think of your action camera as a flashlight in the dark—you hold the right settings, and suddenly everything becomes clearer and brighter. Mastering these low-light tricks turns tricky nights into a well-lit stage, letting your footage shine with clarity and vivid colors. Don’t rely solely on hardware—your skillful adjustments are the key to capturing stunning night action shots. With practice, you’ll navigate the darkness like a pro, transforming shadows into stories worth watching.